The Complete Guide to Lift-Off Hinge Repair & Troubleshooting
The ability to quickly and safely remove a door without tools is, of course, the core advantage of lift-off hinges (also known as detachable or flag hinges). Consequently, this feature is essential for industrial cabinets, equipment enclosures, and a wide array of commercial applications.
However, the moment these hinges fail—whether by sagging, binding, or corroding—this convenience evaporates. It instantly becomes a significant operational hurdle, blocking critical access and causing expensive downtime.
To understand this, we must first define the hinge.
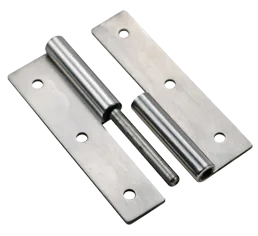
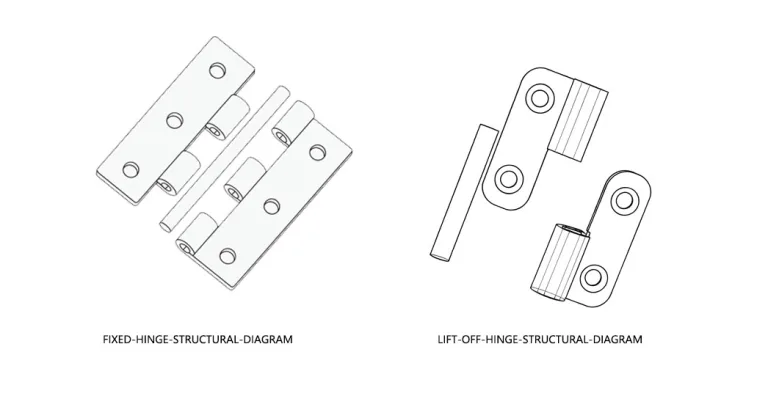
A lift-off hinge consists of two leaves: one with a fixed pin and one with a bushing (or barrel). Because of this design, the door can be lifted vertically off the frame.
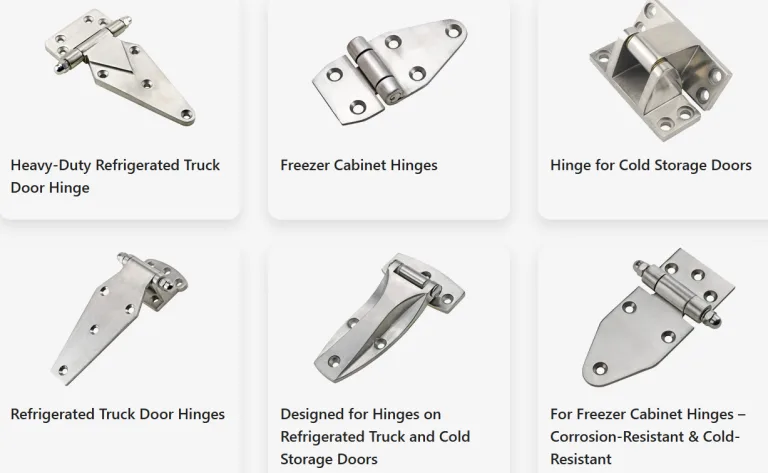
👉 (For a full explanation of the basic structure and working principle of lift-off hinges, see What Is a Lift-Off Hinge and How Does It Work?.)
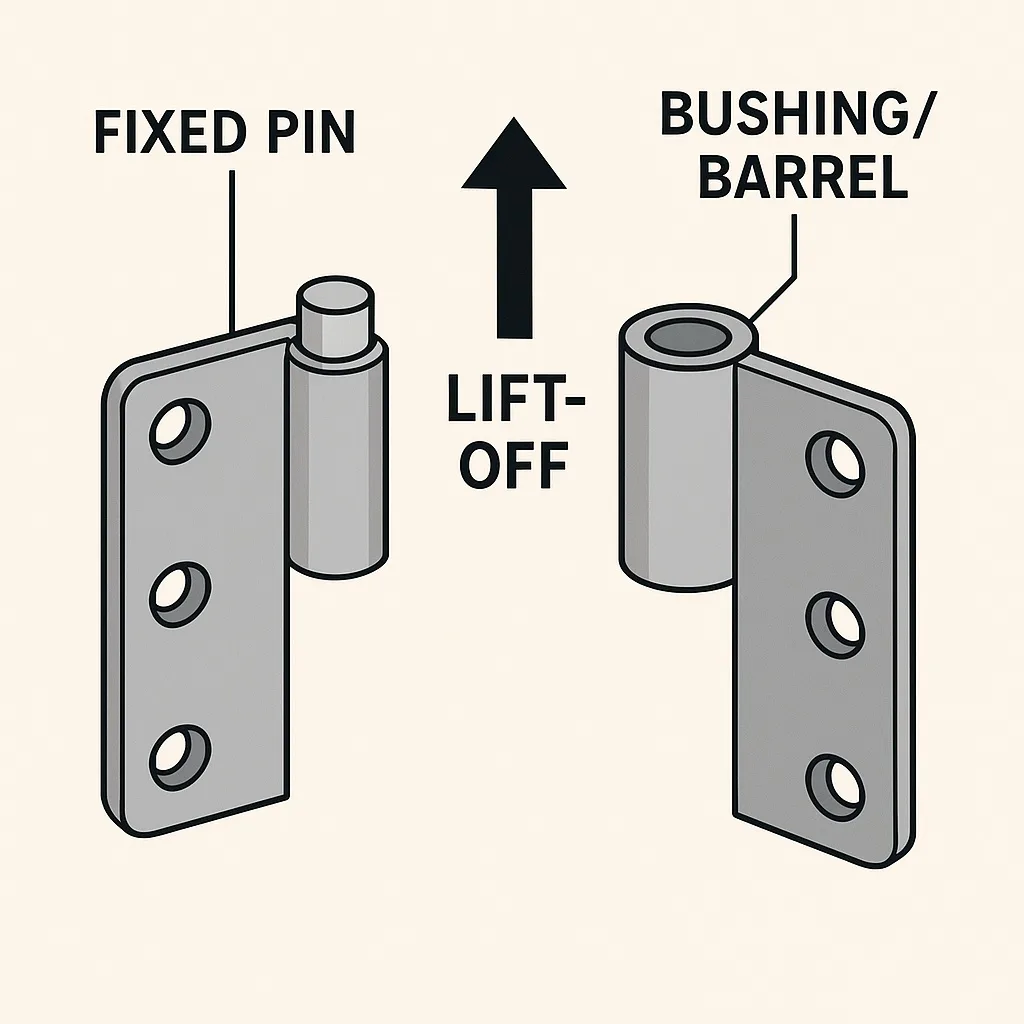
lift-off-hinge-structure-diagram
Therefore, their role is critical in any application requiring frequent access for maintenance or component inspection.
This article, then, serves as a comprehensive troubleshooting guide. In it, we will dissect every common problem that lift-off hinges encounter, from initial installation to long-term wear, and provide detailed, actionable repair steps and prevention strategies.
Diagnosing the Problem: Understanding the Root Causes of Failure
Before any repair can be successful, however, we must accurately diagnose the root cause. In many cases, failure begins long before the hinge is even used, starting at the design and installation stages.
The Root Issue: Specification and Installation Errors
Specification Errors
Indeed, failure is often destined from the very beginning.
- Incorrect Load Rating: For instance, selecting hinges that are underspecified for the door’s actual weight guarantees premature wear and sag.
- Material Mismatch: Likewise, a material mismatch, such as using zinc-plated steel in a marine environment (which demands AISI 316 stainless steel), ensures rapid corrosion.
- Incorrect Handing: Finally, installing a left-hand (LH) hinge on a right-hand (RH) application (or vice-versa) will, of course, prevent the door from closing or lifting off properly.
- 👉 (For a clear explanation of Left-Hand vs Right-Hand orientation, refer to Understanding Lift-Off Hinges: Left-Hand vs Right-Hand.)
Improper Installation
Similarly, the hinge’s lifespan is dictated by its installation accuracy.
- Misalignment: For example, if the hinge pins are not perfectly aligned vertically, the entire load is concentrated onto a single hinge, causing it to fail.
- Loose Fasteners: In addition, if screws and bolts are not tightened to the correct torque specification, they will inevitably work loose.
- Uneven Surfaces: Furthermore, mounting surfaces on the frame or door that are not flat will warp the hinge leaf, which in turn causes the pivot point to bind.
Environmental Attack and Contamination
Beyond installation, environmental factors are a major culprit.
Moisture and Chemical Corrosion
Moisture and Chemical Corrosion, specifically water, salt spray (as tested per ISO 9227), aggressive cleaning agents, or industrial chemicals, will actively degrade the hinge material.
Particulate Contamination
Moreover, Particulate Contamination is a silent killer. Dust, grit, metal shavings, or sand find their way into the hinge’s pivot point. These particles do not lubricate; instead, they act as an abrasive lapping compound, dramatically accelerating wear.
Extreme Temperatures
At the same time, Extreme Temperatures create their own set of problems. Thermal cycling (expansion and contraction) can alter critical material tolerances and cause binding. Additionally, high temperatures will also cause standard lubricants to fail or run out (refer to grease operating temperatures per DIN 51825).
Poor Maintenance and Abuse
Finally, we must consider the direct impact of poor maintenance and outright abuse.
Lack of Lubrication
To begin with, a Lack of Lubrication is catastrophic. The pivot point is a site of direct, high-friction contact. As a result, dry friction (metal-on-metal or metal-on-bushing) is the single most direct cause of seizing, noise, and excessive wear.
Vibration and Shock
Vibration and Shock are also highly detrimental. Specifically, on generator sets, compressors, or transport equipment, constant micro-vibrations are the enemy of fasteners. They will slowly work themselves loose (vibration-proofing standards like DIN 25201).
Abuse
This also applies to Abuse. Slamming the door, leaning on the door panel, or hanging heavy items from the door creates momentary forces. All of these actions generate loads far beyond the hinge’s static rating, leading to permanent damage.
Common Problems and Solutions: A Practical Troubleshooting Guide
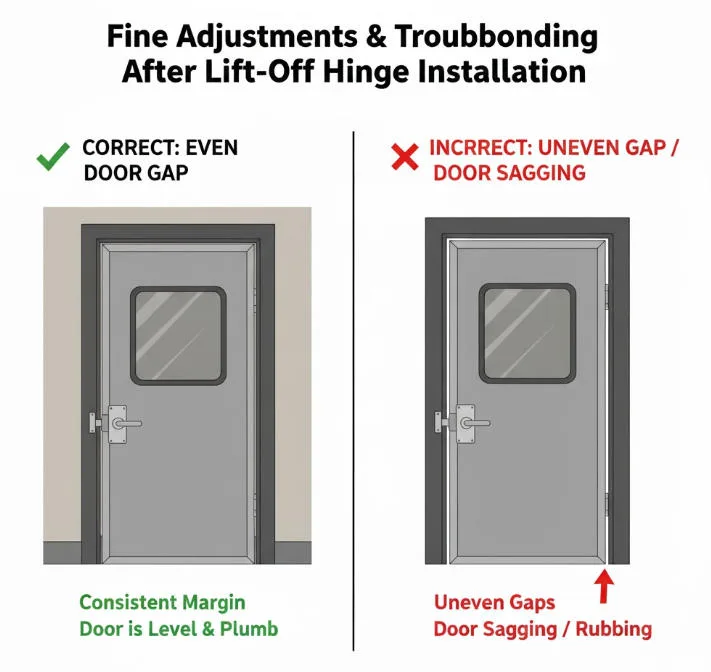
Problem 1: Door Sagging and Misalignment
Symptom Identification
Lift-Off Hinge Failure Leading to Door Drag
- The bottom of the door drags on the floor or threshold.
- The latch or lock bolt fails to align with the strike plate.
- Gaps between the door and frame are visibly uneven.
Cause Analysis
The primary causes are hinge wear (slop), loose fasteners, a warped door/frame, or, most fundamentally, the door load exceeding the hinge’s design limit.
Solution 1: Check and Tighten Fasteners
This is always the first step. Use the correct tool to check every mounting screw and bolt. Then, tighten them to the manufacturer’s recommended torque specification.
Solution 2: Use Shims (Shimming)
If tightening fasteners isn’t enough, the next step is shimming. This is the professional method for fine-tuning alignment. Add thin metal or high-strength plastic shims between the hinge leaf and the door (or frame) to precisely adjust the door’s vertical and horizontal position.
Solution 3: Repair Stripped Fastener Holes
In the event of stripped or enlarged holes, simply tightening the fastener is futile.
- For Metal Doors/Frames: One option is to re-tap the hole for a larger-diameter screw. However, a more robust solution is to install a threaded insert (like a Heli-Coil, per DIN 8140) or a rivet nut to restore the original thread strength.
- For Wood/Composite Doors: In this case, fill the stripped hole with a hardwood dowel and wood glue. Allow it to cure completely, and only then re-drill a new pilot hole.
Solution 4: Evaluate for Replacement
Ultimately, if the sag is caused by severe wear in the pin or bushing, shimming is only a temporary fix. The hinge has reached the end of its life and must be replaced.
Problem 2: Hinge Seizing, Stiff Movement, or Squeaking
Symptom Identification
- Opening or closing the door requires excessive force.
- The movement is jerky and not smooth.
- The hinge emits a high-pitched squeak or a grinding noise.
Cause Analysis
In the vast majority of cases, the cause is a lack of lubrication, combined with a buildup of dirt, debris, or corrosion (rust). A bent pin from an impact is a less common, but possible, cause.
Solution 1: Thorough Cleaning
- First, lift the door off its hinges and set it aside safely.
- Next, use compressed air, a stiff brush (non-metallic), and a solvent (like WD-40, which functions well as a cleaner) to remove all old grease, grime, and rust from the pin and the bushing barrel.
- Finally, wipe all components completely dry.
Solution 2: Proper Lubrication (The Critical Step)
Cleaning is only half the battle. You must apply a new, appropriate lubricant immediately afterward, or the problem will return.
- Lubricant Choice:
- Dry/Dusty Areas: Use a PTFE-based (Teflon) dry lubricant. It forms a slick film that does not attract dust.
- Heavy-Duty/Wet Areas: Conversely, these areas require a high-quality lithium or marine-grade grease. These are tackier and provide superior resistance to water washout and high pressure.
Solution 3: Address Bent Pins
If a pin is only slightly bent, it may be possible to remove and straighten it. However, if it is severely bent, cracked, or broken, do not attempt a repair. Replace the entire hinge immediately.
Problem 3: Corrosion and Rust
Symptom Identification
- Red/brown “red rust” appears on steel components.
- White, powdery oxide forms on aluminum.
- Small, dark “pits” or rust spots appear on stainless steel.
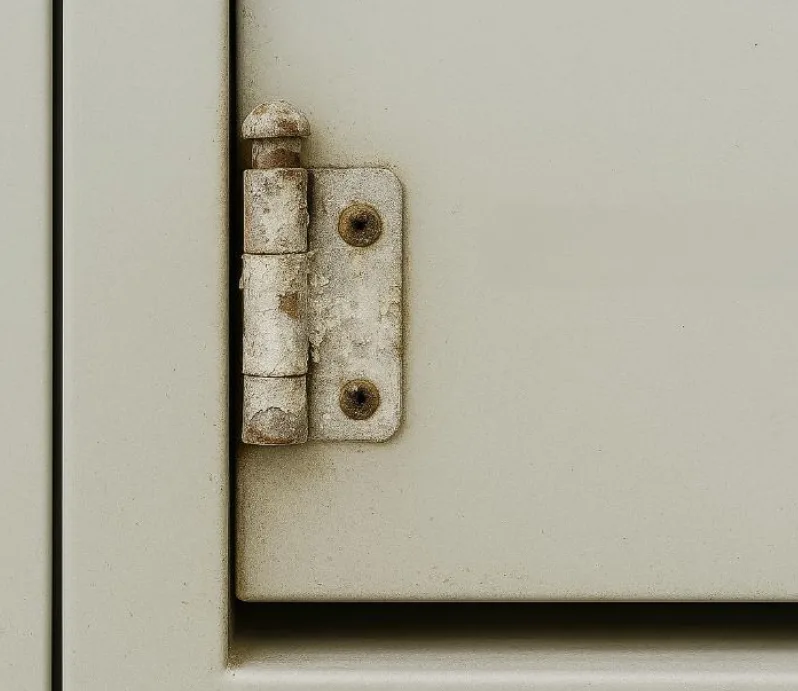
Close-Up of Corrosion on a Lift-Off Hinge of a Control Cabinet Door
Cause Analysis
The root cause is almost always an improper material choice (e.g., an indoor-grade hinge used outdoors). In other cases, the protective coating (like zinc plating per ISO 2081) may be scratched or damaged. Galvanic corrosion can also occur when dissimilar metals are in direct contact.
Solution 1: Surface Treatment (Mild Corrosion)
Use a wire brush, sandpaper, or a chemical rust remover to eliminate surface corrosion.
- Critical Note: When cleaning stainless steel, only use a stainless steel wire brush. A regular steel brush will cause “free iron” contamination and will actually induce rust.
Solution 2: Re-Protect the Surface
After removing rust, the bare metal must be sealed immediately. To do this, apply a rust-inhibiting primer, a matching paint, or a cold galvanizing (zinc-rich) spray.
Solution 3: Prevent Galvanic Corrosion
If dissimilar metals are the problem, you must isolate them. Use non-conductive gaskets, washers, or bushings (made of nylon or rubber) between the hinge leaf and the frame.
Solution 4: The Permanent Fix: Upgrade Materials
In truly harsh environments, stop the cycle of repairs. The only permanent solution is to upgrade the hinges to a more resilient material.
- AISI 304 Stainless: Good for general-purpose outdoor and washdown use.
- AISI 316 Stainless: This grade is mandatory for marine, coastal (salt-spray), and high-chloride chemical environments.
- 👉 (Learn more about hinge materials and surface treatments in Types of Lift-Off Hinges by Material)
Problem 4: Inability to Lift the Door Off
Symptom Identification
This is a critical failure: the hinge’s core “lift-off” function fails. The door feels “welded” to the frame and cannot be removed, no matter how hard you lift.
Cause Analysis
There are two primary causes. First, the pin and bushing have seized together due to severe rust or hardened grime. Second, excessive paint or powder coating has filled the small, necessary clearance gap required for the door to be lifted.
Solution 1: Use Penetrating Oil
First, apply a high-quality penetrating oil liberally to the pivot point. Then, wait patiently for several minutes or even hours. Tapping the hinge with a rubber mallet can help the oil penetrate via vibration.
Solution 2: Clear the Gaps
While the oil soaks, inspect the top and bottom of the hinge pivot. Look for thick paint, sealant, or debris. Use a sharp utility knife to carefully cut away and remove any material that is blocking the lift path.
Solution 3: Apply Controlled Leverage
If the door still won’t budge, place a wood block under the door’s edge to prevent damage. Then, use a pry bar or small hydraulic jack to apply slow, steady, upward pressure. As you apply pressure, gently wiggle the door back and forth to help break the pin free.
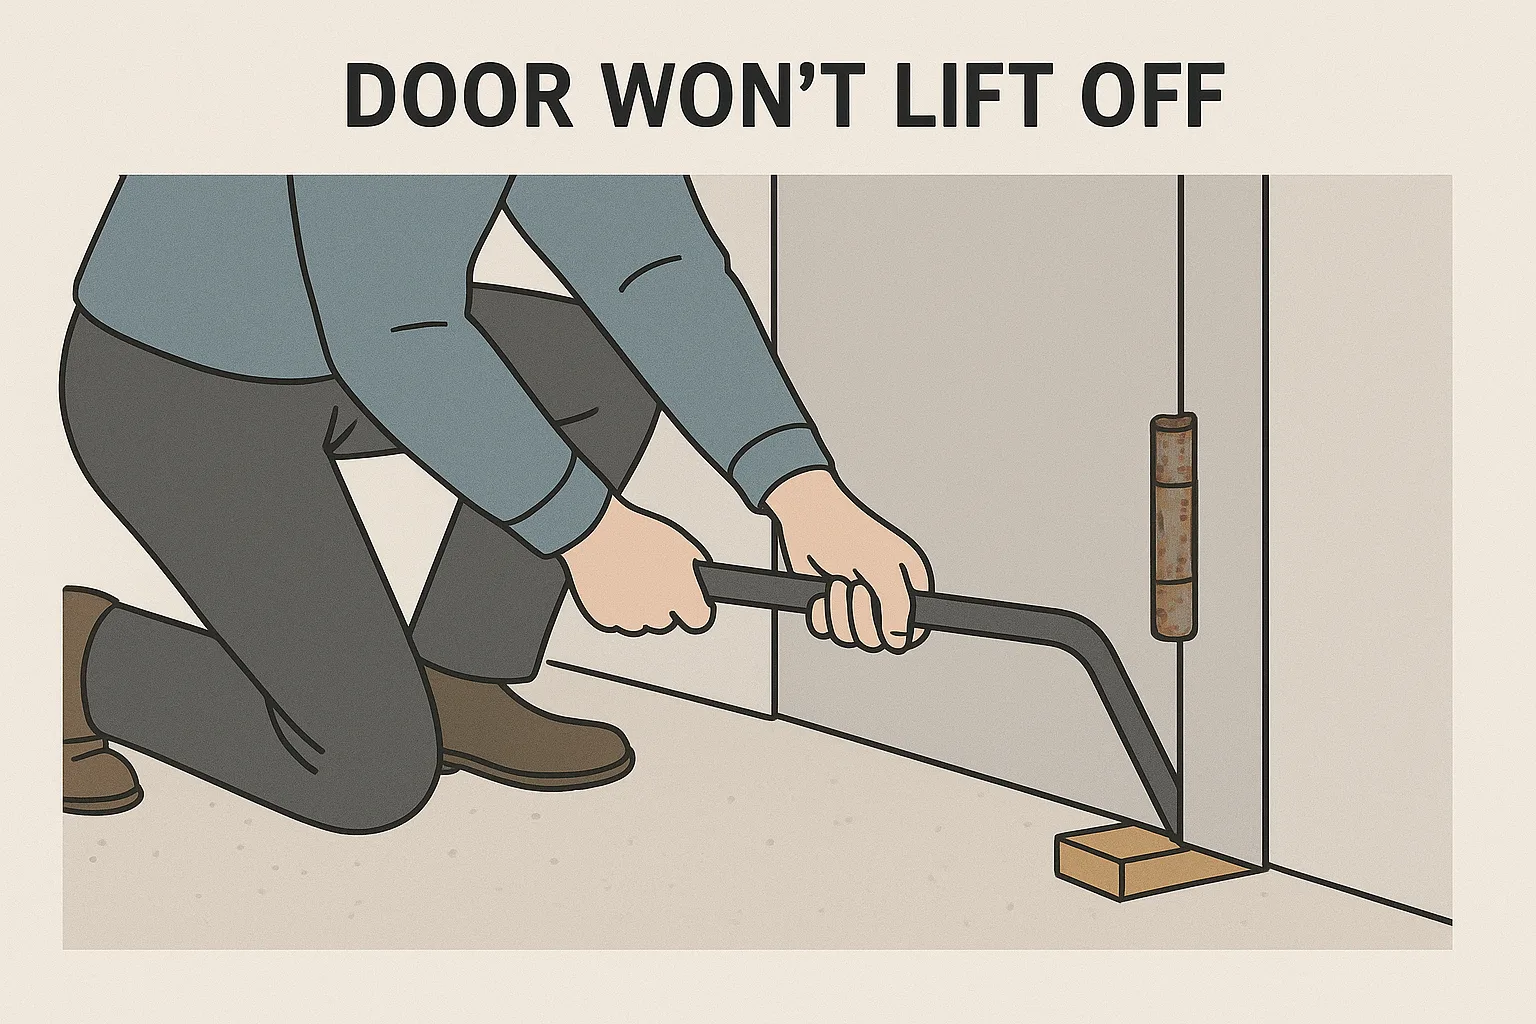
Using a Pry Bar to Free a Stuck Lift-Off Door
Problem 5: Excessive Pin or Bushing Wear (“Pin Slop”)
Symptom Identification
The door can be physically wiggled up-and-down or side-to-side while in the closed position. You may also see fine black metal dust (a product of wear) around the pivot.
Cause Analysis
This is the classic result of overloading, high-cycle use, or abrasive wear from a long-term lack of lubrication.
Solution 1: Replace Bushings (If Possible)
Fortunately, many premium industrial hinges are designed to be serviceable. Their worn bushings (often made of bronze, nylon, or sintered metal) can be pressed out and replaced.
Solution 2: Upgrade to a Bearing Hinge
For very heavy or high-frequency doors, however, a simple bushing is insufficient. In this situation, replace the hinge with a heavy-duty model that incorporates needle bearings or thrust bearings (per ISO 104 standards) to manage high loads.
Solution 3: Replace the Hinge
Unfortunately, if the hinge leaf itself is worn, or the pin is an integral, non-replaceable part of the leaf, the hinge cannot be repaired. The entire assembly must be replaced.
Prevention Over Cure: Proactive Maintenance Strategies
Implement a Regular Inspection Schedule
Ultimately, preventive maintenance is always cheaper than reactive repair.
Inspection Checklist
- Monthly (High-Use Applications): Check fastener tightness.
- Quarterly (Standard-Use): Check door alignment. Also, clean surface dirt and grime from hinges.
- Bi-Annually / Annually: Perform a deep clean and re-lubrication (this frequency depends on environmental severity).
Proper Cleaning and Lubrication Techniques
Cleaning
When cleaning, avoid using a pressure washer directly on the hinge pivots (unless the hinge is IP-sealed, e.g., IP65). This is because high pressure forces water and contaminants into the joint. The correct method is to wipe down with solvents and a cloth.
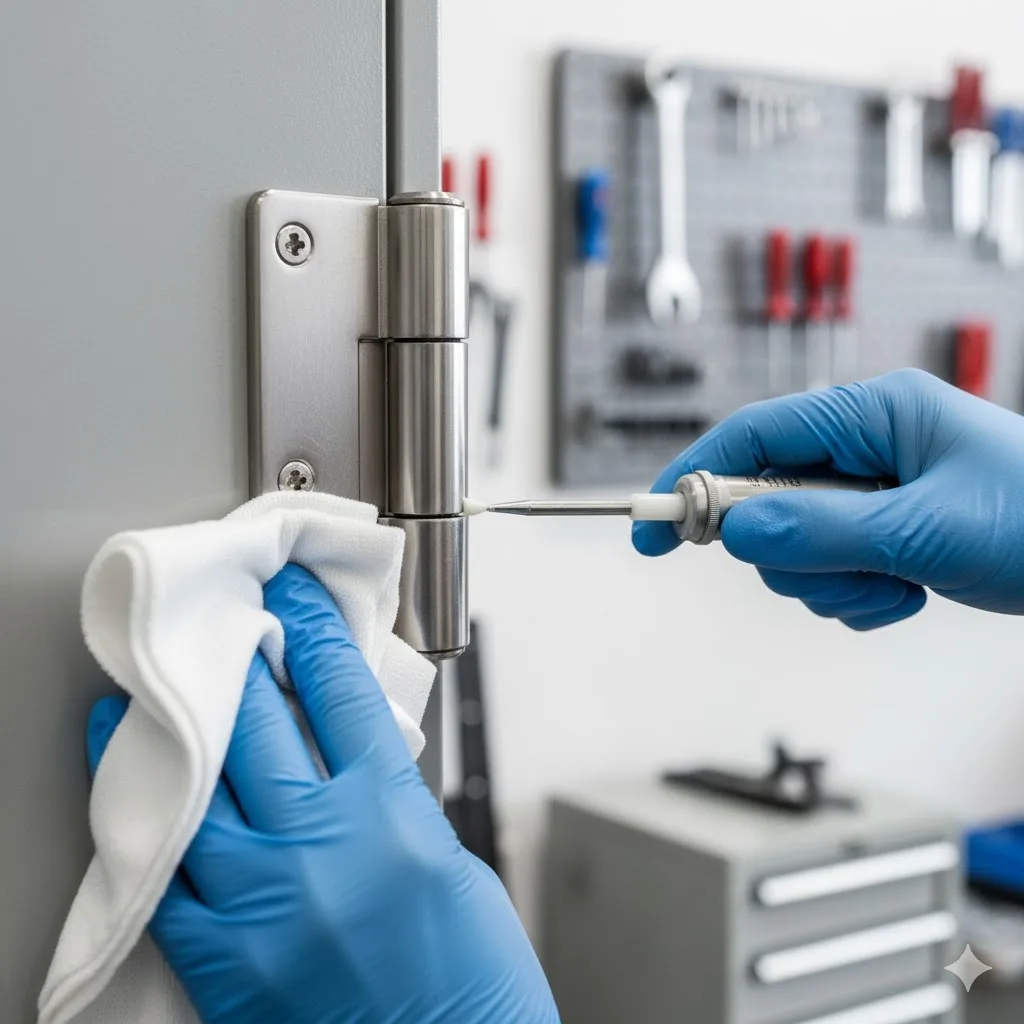
Cleaning and Lubricating Lift-Off Hinges
Lubrication
Similarly, the lubricant must match the application.
- Food & Beverage: Here, you must use an NSF H1-rated food-grade grease.
- High-Temp Areas (e.g., Ovens): These require a high-temperature silicone or PFPE-based grease.
Special Considerations for High-Vibration Environments
Use Threadlocker
During installation, apply a medium-strength (blue), removable anaerobic threadlocker to the fastener threads.
Use Lock Washers
Additionally, use split-ring lock washers (per DIN 127) or toothed lock washers (per DIN 6797) to provide mechanical resistance against loosening.
The Decision Point: When to Repair vs. When to Replace
Assessing the Hinge’s “Health”
Check Structural Integrity
First, look for any fatigue cracks, especially near the bends or fastener holes. Any bend or permanent deformation in the hinge leaf means it must be replaced.
Evaluate Wear
Next, measure the “slop” or play in the hinge. If the door can be visibly wobbled (e.g., more than 1.5mm / 1/16″), the hinge has reached its end of life.
Cost-Benefit Analysis of Repair
When to Repair: This decision is simple. If the issue is limited to loose fasteners, light surface corrosion, dirt, or a lack of lubrication, repair it. The fix is fast, cheap, and should be done immediately.
Clear Signals for Replacement
When to Replace: Conversely, replacement is mandatory if you see these signals:
- Structural cracks or bent leaves are visible.
- Corrosion is severe and has compromised the material’s strength (flaking, deep pitting).
- The pin or bushing is severely worn, and replaceable parts are not available.
- The application has changed (e.g., new equipment was added to the door, making it heavier than the original hinge specification).
How to Select the Right Replacement Hinge (and Avoid Repeating Mistakes)
Key Parameters
- Load Capacity: Always select a hinge rated for more than the door’s actual weight.
- Material: Match the material to the environment (e.g., 316 Stainless for corrosive areas).
- Dimensions & Hole Pattern: Critically, match the existing hole pattern to avoid drilling new holes.
- Handing: This is the most common error. Double-check if you need a Left-Hand (LH) or Right-Hand (RH) hinge.
Conclusion: The Key to Extending Hinge Lifespan
The reliability of a lift-off hinge is not automatic. Instead, it is the direct result of correct specification, precision installation, and consistent maintenance.
The vast majority of hinge failures—sagging, binding, and noise—are preventable. Ignoring these early warning signs will always lead to more costly, mission-critical downtime and emergency replacements.
Therefore, do not wait for a hinge to fail. Inspect the hinges on your critical equipment today. If you are struggling to specify the correct lift-off hinge for a demanding environment (high vibration, corrosive, extreme load), contact our engineering experts for a professional solution.
Frequently Asked Questions (FAQ)
Q: How do I quickly determine “Left-Hand” vs. “Right-Hand” for a lift-off hinge?
A: Standards can vary (ANSI vs. European). However, a common ANSI method is this: Stand on the outside of the enclosure or room. If the door swings toward you and the hinges are on your left, it is a Left-Hand (LH) hinge. If they are on your right, it is a Right-Hand (RH) hinge. Alternatively, the leaf with the fixed pin typically mounts to the fixed frame.
Q: My hinge is just a little stiff. Is it okay to just spray it with WD-40?
A: This is a common mistake. WD-40 is an excellent solvent, cleaner, and penetrating oil, but it is not a long-term lubricant. While it will provide a temporary fix, its thin, oily film will quickly attract dust and grime. Consequently, after using WD-40 to clean the hinge, you must wipe it dry and then apply a real lubricant, such as a PTFE dry lube or a proper grease.
Q: Why is my 304 Stainless Steel hinge rusting?
A: 304 stainless (AISI 304) is “corrosion-resistant,” not “corrosion-proof.” It will rust under two common conditions: 1) High-chloride environments, such as coastal (salt-air) locations or near swimming pools. 2) “Free iron” contamination, which occurs if you use carbon-steel tools (like wrenches or steel wool) on it. For these reasons, you must use AISI 316 (marine-grade) stainless steel in those environments.
Q: How do I stop hinge screws from loosening on vibrating equipment?
A: This requires a multi-layered approach. First, ensure you are using the correct grade of fastener and that it is torqued to the proper specification. Second, use a medium-strength (blue) threadlocker (per DIN 267-27). Finally, use mechanical anti-vibration hardware, such as split-ring lock washers or serrated-tooth lock washers.
Q: Can I paint or powder coat my lift-off hinges?
A: Yes, but with extreme caution. The coating must not be applied to the pivot pin or the inside of the bushing. If the paint or powder coat is too thick, it will completely fill the precise operational tolerances. This will, in turn, cause the hinge to bind or make the “lift-off” function impossible. Therefore, these critical moving surfaces must be masked before any coating process.