Retrofitting Outdoor Cabinet Hinges: Seal & Alignment Guide
Replacing hinges on an outdoor cabinet is not only a hardware change. If the new hinge position, pivot offset, drilling pattern, or gasket contact line is wrong, the cabinet door may still close, but the seal may no longer compress evenly. This can lead to water ingress, dust entry, door binding, latch misalignment, corrosion around mounting holes, and repeated field maintenance.
This guide focuses on the retrofit process for outdoor cabinet doors, especially when old exposed hinges are replaced with concealed, internal, adjustable, or upgraded outdoor hinges. It explains how to use drilling templates, adapter plates, alignment checks, and gasket re-fit steps to protect door movement and weather sealing.
This article focuses on the retrofit process itself — drilling templates, pivot offset, gasket re-fit, and final alignment. For the broader question of which hinge type fits a specific outdoor application, the dedicated electrical enclosure door hinge guide covers selection by load, sealing, and grounding requirements. This page assumes the new hinge has already been selected and now needs to be installed without breaking the cabinet’s weather protection.
Why Outdoor Cabinet Hinge Retrofits Often Fail
A hinge retrofit usually looks simple from the outside: remove the old hinge, mark new holes, drill, install the new hinge, and adjust the door. In outdoor cabinets, however, small installation errors can create serious long-term problems.
The most common failure is not that the hinge breaks immediately. The more common problem is that the door position changes slightly after the retrofit. A small change in hinge offset, mounting height, or pivot location can affect how the door meets the gasket. Once the gasket is under-compressed in one area and over-compressed in another, the cabinet may lose reliable weather protection.
This is especially important for electrical enclosures, telecom cabinets, outdoor control boxes, machine cabinets, and equipment housings where the hinge is part of the sealing system. The hinge must support the door, maintain alignment, and allow the gasket and latch to work together. Cumulative misalignment is exactly the kind of “silent failure” covered in hinge alignment as the hidden cost of cabinet failure, and the same logic applies during retrofit.
When a Hinge Retrofit Makes Sense
A retrofit may be necessary when the original hinge is corroded, loose, undersized, difficult to clean, poorly aligned, or no longer able to keep the cabinet door in the correct position. It may also be required when a customer wants improved appearance, better tamper resistance, easier service access, or a more compact hinge design.
Common retrofit situations include replacing rusted exposed hinges, upgrading light-duty hinges on heavy outdoor doors, changing to concealed hinges for a cleaner exterior, adding adjustable hinges to correct minor misalignment, or replacing old hinges after gasket failure has appeared around the door frame.
However, a retrofit is not always the best solution. If the cabinet frame is twisted, the door panel is deformed, the latch position is wrong, or the gasket channel is damaged, a new hinge alone will not solve the sealing problem. In those cases, the cabinet door, frame, latch, and gasket should be reviewed as a complete system.
Check the Original Door Geometry Before Removing the Old Hinges
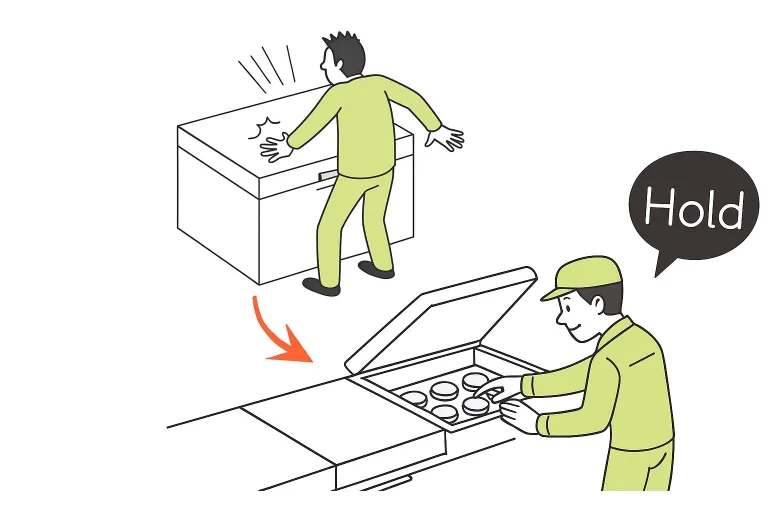
Before removing the original hinges, record the existing door position. This step is often skipped, but it is one of the most important parts of a successful retrofit.
Measure the door gap at the top, bottom, latch side, and hinge side. Check whether the door is already sagging. Look at the gasket contact marks and confirm whether the compression line is even. If the old hinge has already allowed the door to drop, the new hinge should not simply copy the old failed position.
You should also record the original hinge offset. The hinge offset controls how the door swings into the frame and how the gasket is compressed during closing. If the new hinge changes this movement path, the door may rub the gasket, pinch the seal, or leave a gap near the hinge side.
| Pre-Retrofit Check | Why It Matters | What to Record |
|---|---|---|
| Top and bottom door gap | Shows whether the door is already sagging | Gap size before removal |
| Hinge-side clearance | Affects swing movement and gasket contact | Distance between door edge and frame |
| Latch-side compression | Shows whether the gasket is sealing evenly | Visible compression marks or leak points |
| Hinge offset | Controls the door closing path | Pivot position and mounting height |
| Mounting hole condition | Weak holes can cause future loosening | Rust, elongation, cracks, or stripped threads |
Choose the Retrofit Hinge Type Based on the Existing Cabinet Structure
The best retrofit hinge is not always the strongest hinge or the most hidden hinge. It must match the cabinet door thickness, frame structure, original hinge location, gasket design, opening angle, and service environment.
Replacing Exposed Hinges with Similar Exposed Hinges
This is usually the lowest-risk retrofit. If the new hinge has a similar leaf size, offset, and pivot position, the door movement path may remain close to the original design. It is still important to check load capacity, corrosion resistance, fastener compatibility, and hole condition.
This approach is useful when the main issue is rust, worn pins, loose screws, or insufficient hinge thickness, but the original door design and gasket position are still acceptable.
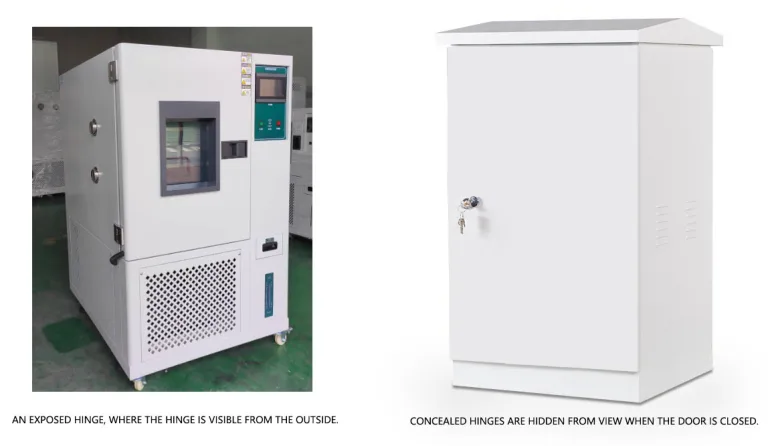
Replacing Exposed Hinges with Concealed Hinges
Changing from exposed hinges to concealed hinges can improve appearance and reduce external tampering points, but it also creates more retrofit risk. Concealed hinges often require a different mounting surface, a different pivot location, or additional clearance inside the cabinet.
Before choosing this option, confirm that the door and frame have enough structure for the new mounting points. Do not assume a concealed hinge will automatically improve sealing. If the hinge changes the compression path, the gasket may seal worse than before. The selection rationale for moving to concealed hinges — security, IP66 sealing, and tamper resistance — is covered in why outdoor cabinets require concealed hinges, and that reasoning should be confirmed before the retrofit begins.
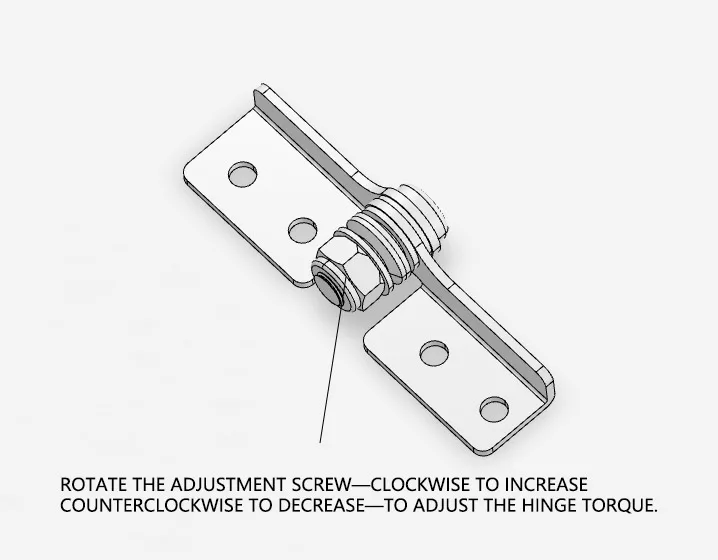
Using Adjustable Hinges for Alignment Correction
Adjustable hinges can help when the cabinet door needs minor vertical, horizontal, or depth correction after installation. They are useful for outdoor cabinets that may shift during transport, field installation, or long service life.
The limitation is that adjustment features must be locked securely. If the adjustment screws loosen under vibration, temperature cycling, or repeated service access, the door may lose alignment again. For outdoor use, adjustment points should also be protected from corrosion and water accumulation.
Using Adapter Plates When Hole Patterns Do Not Match
If the new hinge hole pattern does not match the original holes, an adapter plate may be safer than drilling multiple new holes directly into a weakened door or frame. Adapter plates can help distribute load, cover old holes, and create a controlled mounting surface for the new hinge.
This is especially useful when old holes are elongated, corroded, stripped, or too close to the edge. A well-designed adapter plate can reduce the risk of pull-out and help keep the hinge line straight.
Use Drilling Templates to Control Hole Position and Repeatability
Drilling templates are important because hinge retrofits depend on repeatable hole placement. If two hinges are installed at slightly different positions, the door may bind, twist, or pull against the gasket unevenly. The larger and heavier the cabinet door, the more important hole accuracy becomes.
A retrofit drilling template should control at least three things: hinge height, distance from the door edge, and hole spacing. For production or repeated cabinet retrofits, the template should also include a stop edge, locator pins, or a clamping feature so technicians can repeat the same position across multiple doors.
For one-off repairs, a simple marked template may be enough. For OEM production, field service programs, or large cabinet batches, a metal or acrylic drilling jig is usually more reliable than measuring every hole by hand.
| Template Feature | Purpose | Retrofit Benefit |
|---|---|---|
| Edge stop | Controls distance from the door edge | Reduces inconsistent hinge offset |
| Locator pins | References existing holes or frame edges | Improves repeatability |
| Drill bushings | Guides the drill bit | Reduces bit walking and hole enlargement |
| Clamp area | Holds the template in place | Prevents movement during drilling |
| Depth stop reference | Controls drilling depth | Reduces damage to thin doors or frames |
When retrofitting thin sheet-metal cabinet doors, avoid oversized holes unless the hinge design requires them. Oversized or misaligned holes can reduce clamping strength and allow the hinge to shift under load. If the cabinet door is aluminum, coated steel, or stainless steel, deburring and edge protection are also important to reduce corrosion risk around the drilled holes.
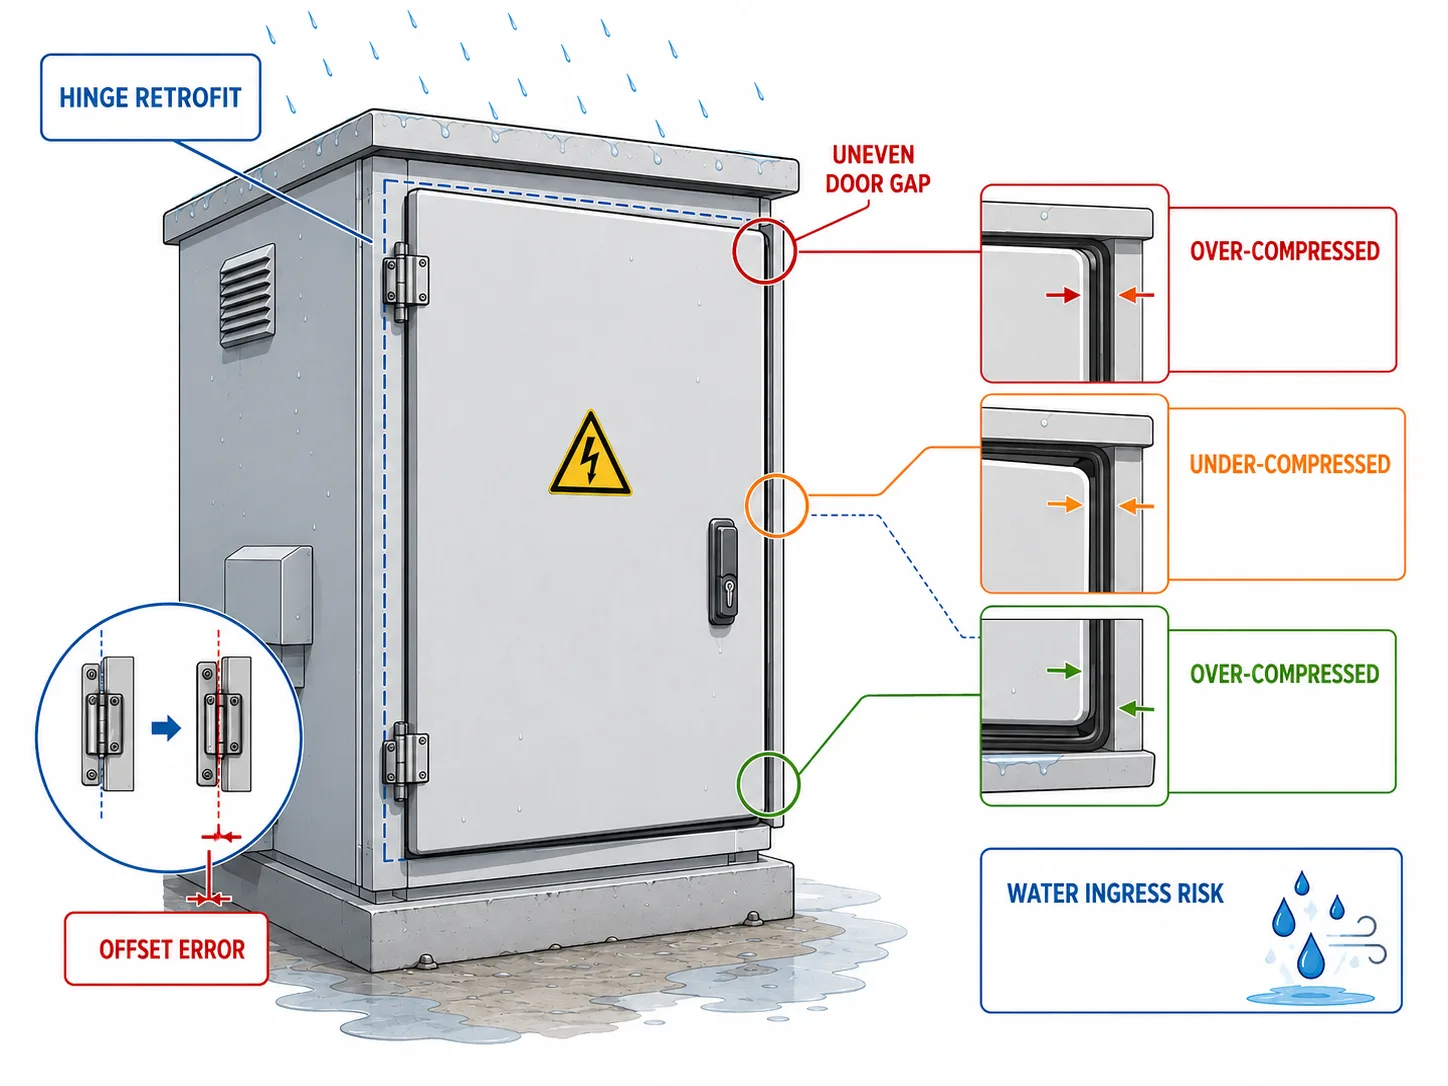
Protect the Gasket Compression Path During Retrofit
The gasket compression path is the way the cabinet door moves into the seal when it closes. During a hinge retrofit, this path can change if the hinge pivot moves outward, inward, upward, or downward compared with the original design.
If the pivot moves too far outward, the door may pull against the gasket unevenly. If the pivot moves too far inward, the door may rub the frame or pinch the gasket near the hinge side. If the hinge line is not straight, the door may twist during closing.
For outdoor cabinets, the goal is not only to make the door close. The goal is to make the door close with consistent gasket compression around the frame. This is why the hinge, gasket, latch, and door stiffness must be checked together.
If the cabinet is designed for water and dust protection, remember that the hinge does not create the IP rating by itself. The full door system must be reviewed, including gasket compression, latch engagement, frame stiffness, drain design, and installation tolerance — and the underlying rating system is defined by IEC 60529, the international IP rating standard. For deeper selection guidance around sealed industrial cabinets, the industrial enclosure hinge selection guide covers material, gasket, and load decisions as a complete system.
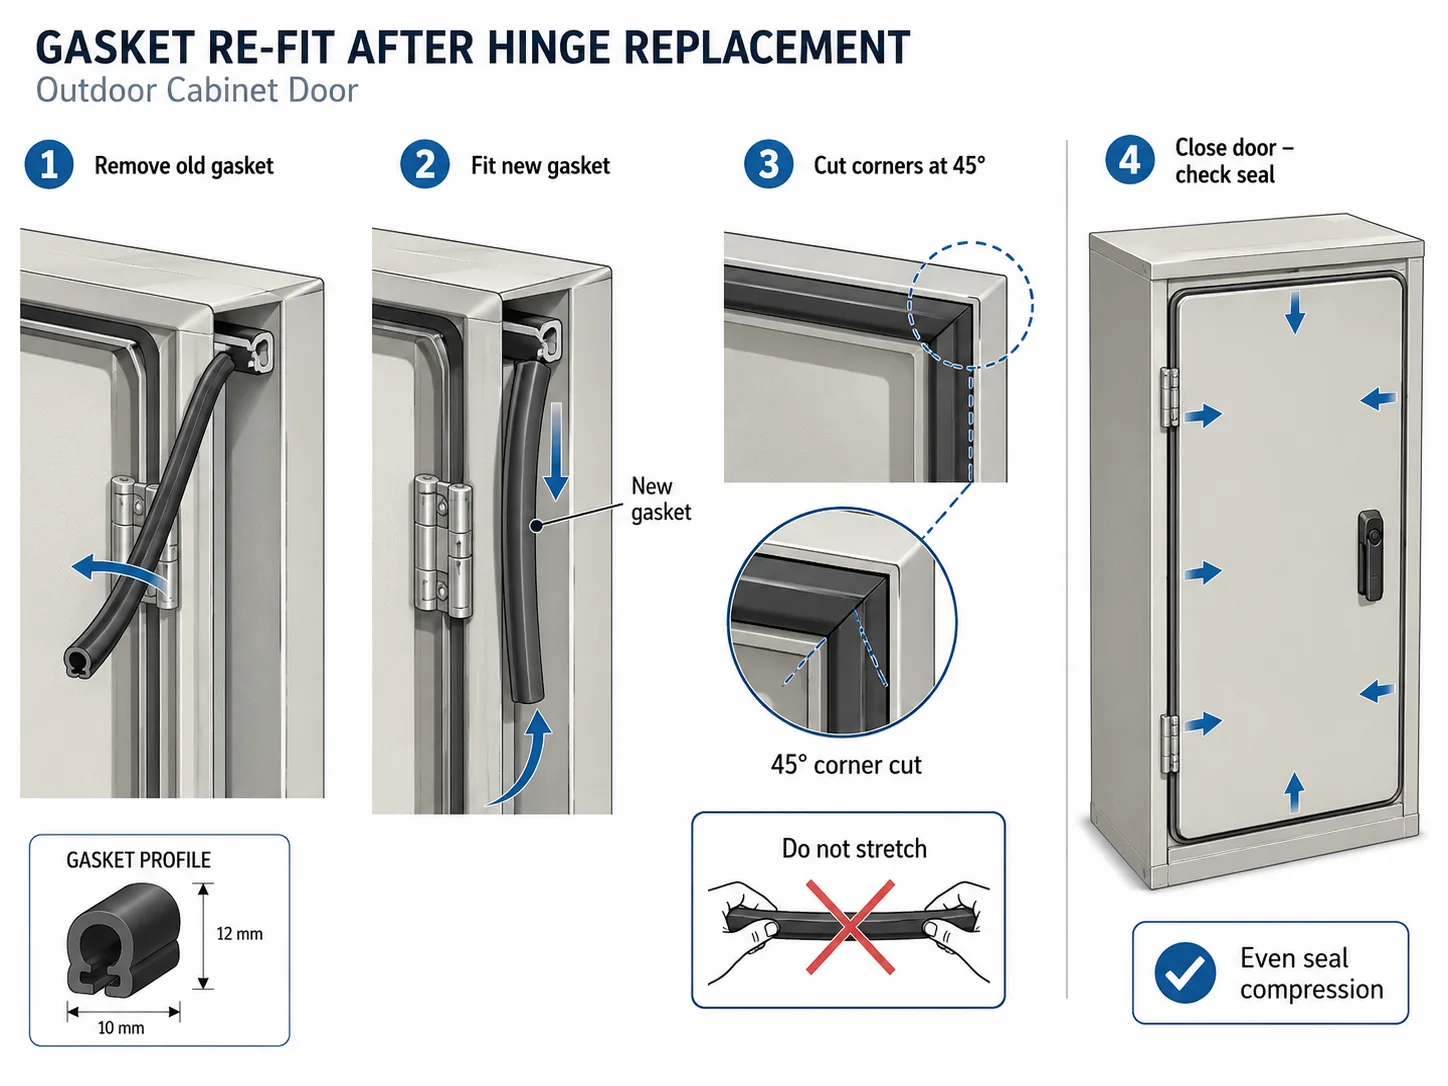
Re-Fit or Replace the Gasket After the Hinge Change
After the hinge retrofit, the original gasket should be inspected carefully. Even if the gasket looks acceptable, the door movement may have changed enough to affect compression. A gasket that worked with the old hinge may not work correctly with the new hinge position.
Check for flattened areas, cuts, hardened sections, adhesive failure, corner gaps, and uneven compression marks. If the gasket has lost elasticity or no longer sits firmly in the channel, replacement is safer than reuse.
When re-fitting the gasket, clean the channel, remove old adhesive, avoid stretching the gasket during installation, and pay special attention to corners. Stretched gaskets may shrink later and create gaps. Overlapped corners may prevent the door from closing evenly. A mitered or molded corner is usually more reliable than a rough overlap.
| Gasket Issue | Possible Cause | Retrofit Action |
|---|---|---|
| Leak near hinge side | New hinge offset changed door movement | Check pivot location and gasket compression |
| Door hard to close | Gasket too thick or over-compressed | Review gasket profile and latch engagement |
| Gap at corners | Gasket stretched, cut poorly, or misaligned | Re-cut corners and re-fit without tension |
| Uneven compression marks | Door sag, twisted frame, or hinge misalignment | Adjust hinge position and verify door flatness |
| Water around mounting holes | Unsealed drilled holes or damaged coating | Seal holes and protect exposed metal edges |
Check Door Weight, Width, and Hinge Load Before Final Installation
A retrofit hinge should not be selected only by matching the old hinge size. Outdoor cabinet doors may carry locks, handles, reinforcement ribs, insulation, grounding straps, cable holders, or mounted accessories. These added parts increase the load on the hinge line.
Door width also matters. A wide cabinet door creates more leverage on the hinge line than a narrow door of the same weight. If the replacement hinge is too light, the door may appear acceptable after installation but gradually sag during service.
For heavy doors, wide doors, or high-service-frequency cabinets, check the hinge load capacity, hinge spacing, mounting strength, and safety margin before installation. The full sizing logic — door weight, safety factor, hinge spacing — is covered in heavy-duty hinge selection, and should be applied before approving the retrofit hinge.
Seal and Protect New Mounting Holes
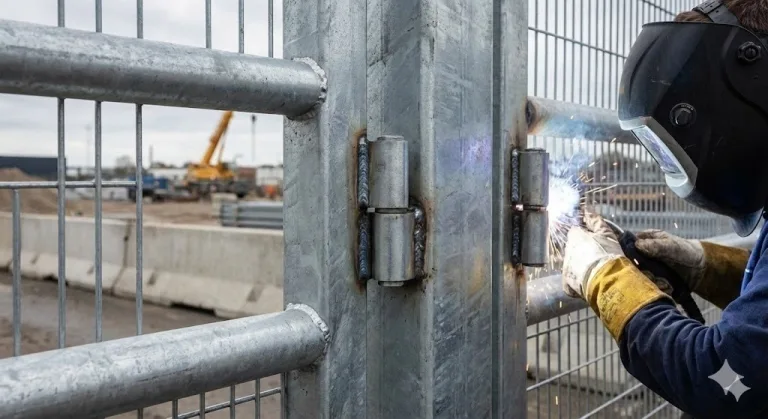
New mounting holes are a common weak point in outdoor cabinet retrofits. Drilling can remove paint, powder coating, zinc coating, or passivation layers around the hole. If the exposed edge is not protected, corrosion may begin around the fastener or mounting plate.
After drilling, remove burrs, clean the surface, and protect exposed metal edges according to the cabinet material and project requirements. Use compatible fasteners, washers, and isolation materials when mixed metals are involved. In wet outdoor environments, galvanic corrosion can appear around screws and mounting holes if stainless steel, aluminum, coated steel, and carbon steel parts are combined without proper review.
If the cabinet will be used near coastal roads, ports, chemical facilities, or high-humidity areas, the corrosion risk should be reviewed more carefully. For coastal and chloride-rich environments, the NEMA 4X hinge specification for coastal projects documents the material, fastener, and gasket requirements that go beyond a standard outdoor retrofit.
Retrofit Installation Checklist
Use this checklist before final tightening and field approval:
- Record original door gaps before removing the old hinge.
- Check whether the existing door is already sagging or twisted.
- Confirm the new hinge offset and pivot position before drilling.
- Use a drilling template or jig to control hole position.
- Use adapter plates if old holes are damaged or the new pattern does not match.
- Protect drilled edges from corrosion after deburring.
- Check fastener material compatibility with the hinge and cabinet body.
- Re-fit or replace the gasket if compression is uneven.
- Test the door with the latch engaged, not only with the door loosely closed.
- Inspect hinge-side, latch-side, top, and bottom gasket compression.
- Open and close the door several times to check binding, rubbing, or movement.
- Document the final hinge position for future maintenance or repeat retrofits.
Common Retrofit Mistakes to Avoid
Copying the Old Hole Position Without Checking Door Sag
If the old hinge already allowed the door to sag, copying the old hole position may lock the new hinge into the same bad alignment. Always check the door gap and gasket compression before deciding whether to reuse the old reference points.
Changing the Pivot Offset Without Testing the Seal
A hinge with a different pivot offset may look compatible but change how the door enters the gasket. This can create rubbing, pinching, or under-compression. Test the door movement before final drilling whenever possible.
Using a Stronger Hinge Without Reinforcing the Mounting Area
A stronger hinge does not help if the door skin, frame edge, or screw holes are weak. In retrofit projects, the mounting area often needs reinforcement, backing plates, threaded inserts, or adapter plates.
Ignoring the Latch After the Hinge Change
The latch and hinge work together to compress the gasket. If the hinge position changes, the latch may need adjustment. A door that closes with force is not the same as a door that seals evenly.
Reusing a Damaged Gasket
Old gaskets may look usable but fail after the hinge position changes. If the gasket is hardened, flattened, cut, loose, or poorly joined at the corners, replacement is usually safer than reuse.
How This Retrofit Topic Differs from Other Outdoor Hinge Guides
This article is about the retrofit process: drilling templates, hole position, hinge offset, gasket re-fit, mounting-hole protection, and final alignment checks. It does not replace an application-specific hinge selection guide.
For example, marine and coastal cabinets require a deeper review of chloride corrosion, fastener compatibility, and salt-aerosol exposure that goes beyond a standard retrofit checklist. A rooftop cabinet on a coastal site may need different hinge material, gasket selection, and validation than a general outdoor equipment box.
Keeping this content boundary clear helps avoid overlap. This retrofit guide answers: “How do we replace or upgrade the hinge without damaging alignment and sealing?” Application-specific guides — coastal, electrical, industrial enclosure — answer: “Which hinge design is suitable for this environment from the start?”
FAQ
Can I replace exposed outdoor cabinet hinges with concealed hinges?
Yes, but only if the cabinet door and frame have enough structure for the new hinge mounting points. You must also check pivot offset, internal clearance, gasket compression, and latch engagement. Concealed hinges can improve appearance and reduce external tampering points, but they do not automatically improve weather sealing.
Do I need a drilling template for a hinge retrofit?
A drilling template is strongly recommended when hinge position affects door alignment, gasket compression, or repeatability across multiple doors. It reduces hole-position errors and helps prevent door binding after installation.
Can I reuse the original gasket after replacing the hinges?
You can reuse it only if it remains flexible, properly seated, and evenly compressed after the new hinge is installed. If the gasket is flattened, cracked, loose, stretched, or misaligned, replacement is safer.
Why does the cabinet door leak after a hinge replacement?
The most common reasons are changed hinge offset, uneven door gaps, poor gasket compression, damaged gasket corners, unsealed mounting holes, or latch misalignment. The hinge may be strong enough, but the door may no longer press evenly against the gasket.
Should old hinge holes be reused?
Old holes can be reused only if they are structurally sound, correctly positioned, and compatible with the new hinge. If the holes are corroded, enlarged, stripped, or misaligned, use repair methods such as backing plates, threaded inserts, or adapter plates.
Does a new hinge restore the cabinet’s IP rating?
No. A hinge alone does not restore or create an IP rating. Weather protection depends on the full door system, including hinge alignment, gasket compression, latch force, frame stiffness, mounting-hole sealing, and installation quality.