Torque Hinge Sample Testing Checklist for OEM Buyers
Ordering torque hinge samples is not just a purchasing step. For OEM buyers, engineers, and project teams, sample testing is the bridge between a promising hinge specification and a production-ready door, lid, display, or access panel. A torque hinge that feels correct in your hand may behave very differently once it is mounted on the real product with the actual panel weight, center of gravity, gasket compression, opening angle, and user force requirement.
That is why torque hinge samples should be tested as part of the full product system, not as loose hardware on a desk. The goal is not only to confirm whether the hinge opens and closes. The goal is to verify whether the selected torque range, hinge layout, fastener strategy, and user experience can survive real use before the OEM commits to tooling, pilot production, or bulk purchasing.
This guide gives OEM buyers, mechanical engineers, procurement teams, and project managers a practical checklist for evaluating torque hinge samples before production approval. If you are still narrowing down which hinge to sample in the first place, our torque hinge selection guide covers how to match torque range, material, and orientation to the application.
Quick Answer: What Should OEM Buyers Test Before Approving Torque Hinge Samples?
Before approving a torque hinge sample, OEM buyers should test the hinge on the real application or a representative prototype. Confirm the panel weight, center of gravity, required opening angle, holding position, user force, torque consistency, mounting strength, hinge quantity, fastener security, cycle performance, environmental exposure, and production repeatability. A sample should not be approved only because it “feels good” by hand. It should hold the actual door, lid, or display in the required positions without drifting, sagging, binding, or creating an uncomfortable opening force.
Why Sample Testing Matters Before Bulk Orders
Many torque hinge projects start with a simple question: “Can this hinge hold my panel in position?” That question sounds straightforward, but the answer depends on more than the hinge model number.
A torque hinge creates controlled resistance around a pivot. Whether that resistance is correct depends on the full geometry of the product. A small access cover may need only light holding torque. A display arm, flip-up lid, medical device cover, or instrument panel may need a higher torque range, tighter motion control, or a specific feel at different angles.
A sample test protects both the buyer and the supplier. It helps the buyer avoid ordering the wrong torque range, and it helps the supplier recommend a part based on real application data instead of guessing from a photo.
Sample testing is especially important when:
- The panel must hold open without a gas spring or stay arm.
- The cover must stop at multiple angles.
- The user opening force must feel smooth and predictable.
- The hinge is used in a display, control panel, medical device, industrial enclosure, or compact access cover.
- The project may move from samples to 500, 1,000, or several thousand units per month.
- The mounting space is limited.
- The panel weight or center of gravity may change during product development.
A sample test should answer one practical question: Can this hinge work in the real product, at the real angle, with the real load, for the real user?
Step 1: Confirm the Application Before Testing
Before ordering samples, define what the hinge is supposed to do. Many sample failures happen because the buyer asks for a hinge model but does not provide the application conditions.
Start with the product type:
| Application | What to Confirm First |
|---|---|
| Display or monitor | Screen weight, center of gravity, viewing angle, user adjustment force |
| Access cover | Lid weight, opening angle, service position, technician clearance |
| Control panel | Panel weight, wire routing, cable movement, holding angle |
| Medical or dental equipment | Load stability, smooth motion, safety position, repeated adjustment |
| Compact equipment lid | Space limit, hinge size, hand feel, open-stop behavior |
| Industrial enclosure door | Door weight, gasket force, access frequency, vibration exposure |
A torque hinge should be tested against its job. A hinge for a compact cover is not tested the same way as a hinge for a heavy display or a medical equipment arm.
Step 2: Measure the Real Panel Weight
The first test input is the actual panel weight. Do not estimate from the bare sheet metal or plastic cover alone. The final assembly may include insulation, glass, handles, seals, display modules, wiring, brackets, fasteners, labels, or protective covers. All of these can change the torque requirement.
For accurate sample testing, record:
| Item | Record This |
|---|---|
| Bare panel weight | Weight before accessories |
| Final assembly weight | Weight with handle, gasket, screen, wiring, or hardware |
| Expected production tolerance | Possible weight variation between units |
| Future design changes | Added sensors, thicker panel, heavier display, larger cover |
A hinge that holds a prototype cover may fail after the product team adds a thicker screen, a gasket, or a larger handle. Testing should use the closest possible version of the production assembly.
Step 3: Locate the Center of Gravity
Torque depends not only on weight, but also on how far the weight acts from the hinge axis. The center of gravity is often the missing detail in early hinge discussions.
For example, two panels can have the same weight but require different torque if one panel’s mass is concentrated far from the hinge line. A display with a heavy front glass may also feel different from a simple metal lid of the same weight.
For sample testing, confirm:
- Distance from hinge axis to center of gravity
- Whether the load shifts as the panel opens
- Whether cables or attached components pull on the panel
- Whether the user will add accessories after installation
- Whether the panel is vertical, horizontal, angled, or flip-up
If the center of gravity is uncertain, test multiple torque levels. Do not approve a production hinge based only on estimated panel weight. For worked examples of how panel weight and center-of-gravity distance translate into a torque figure, see our torque hinge calculation case studies.
Step 4: Define the Required Opening Angle
A torque hinge should be tested at the angles that matter in real use. Some panels need only one open position. Others need stable positioning across a wide range.
Common requirements include:
| Requirement | Testing Focus |
|---|---|
| Hold fully open | Check stability at the service angle |
| Hold at any angle | Check drift across the full opening range |
| Hold near 90 degrees | Check user force and stopping behavior |
| Hold at 120–170 degrees | Check torque at the high-angle position |
| Open smoothly but not hold | Check motion resistance, not static holding |
| Stay closed under vibration | Check closing force and latch interaction |
A hinge that holds at 90 degrees may not hold at 150 degrees. A hinge that feels smooth at low angle may feel stiff near the end of travel. That is why the test should include the full opening range required by the product.
Step 5: Test Holding Performance on the Real Mounting Geometry
Loose-hand testing is useful only for first impression. It cannot approve the hinge.
Mount the sample on the actual prototype, or on a test fixture that matches:
- Real hinge spacing
- Real panel thickness
- Real screw position
- Real frame material
- Real opening direction
- Real hinge orientation
- Real fasteners
- Real number of hinges
Then test whether the panel stays where it should. The result should be judged by actual behavior, not only by the catalog torque value.
A good test asks:
| Test Question | Pass Condition |
|---|---|
| Does the panel hold at the required angle? | No drift under normal use |
| Does the panel fall closed? | No unsafe or unexpected closing |
| Does the panel feel too stiff? | User can open and close comfortably |
| Does the hinge bind? | Smooth motion through the full travel |
| Does the door sag? | Alignment remains stable |
| Do fasteners loosen? | No visible movement at mounting points |
If the hinge holds position but feels too stiff for the user, it may still be the wrong torque range.
Step 6: Check User Force and Product Feel
For many OEM products, user feel is part of product quality. This is especially true for displays, medical devices, laboratory equipment, consumer electronics, control panels, and premium industrial equipment.
A torque hinge should not only hold the load. It should move in a way that feels intentional.
Test these user-experience points:
- Initial opening force
- Smoothness through the full range
- Closing resistance
- Whether motion feels balanced
- Whether the panel can be adjusted with one hand
- Whether the hinge feels too tight at small angles
- Whether the hinge feels too loose near full open
- Whether left and right hinges feel consistent
- Whether the motion changes after repeated use
Do not assume higher torque is always better. Too much torque can make the product feel stiff, cheap, or difficult to use. Too little torque can make the panel feel unstable. The correct torque is the one that balances holding performance and user comfort.
Step 7: Test Multiple Torque Levels
If the application is new, do not test only one torque value. Testing two or three torque levels gives the engineering team a better chance of finding the correct range.
| Sample Set | Purpose |
|---|---|
| Lower torque sample | Checks minimum user force and light holding |
| Target torque sample | Checks expected design condition |
| Higher torque sample | Checks safety margin and stronger holding |
| Adjustable torque sample | Helps tune feel during prototype stage |
This is especially useful when panel weight, center of gravity, or user feel is not finalized. An adjustable torque hinge can help during development because it lets the team tune the resistance before locking the final production specification.
Step 8: Check Hinge Quantity, Spacing, and Mounting Strength
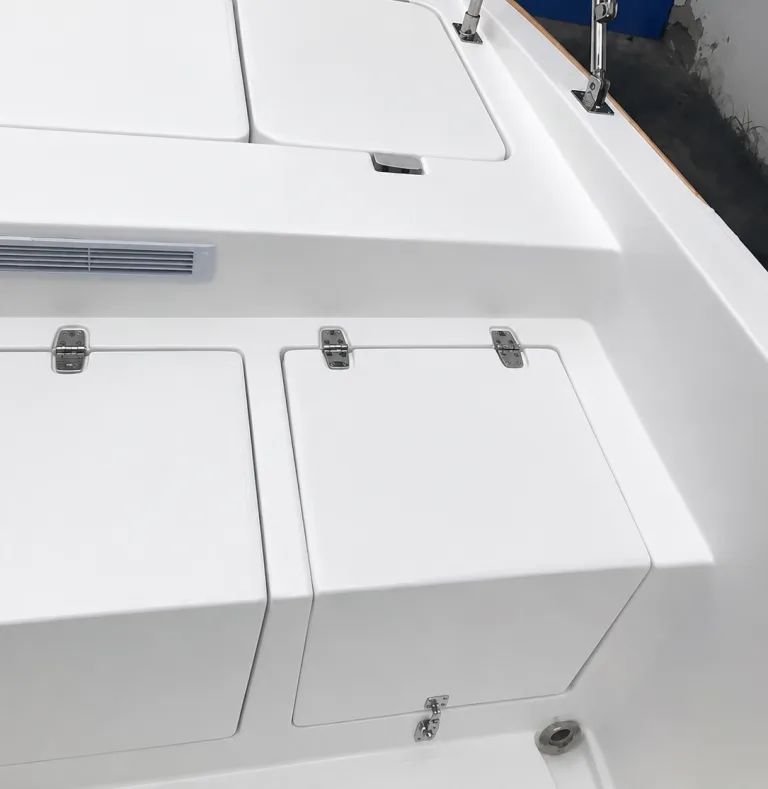
Torque hinge performance depends on layout. One hinge may not behave the same as two hinges. Two hinges mounted close together may not behave like two hinges spaced across the panel width. Test the planned production layout — number of hinges, distance between them, position relative to panel edges, mounting screw pattern, and door and frame stiffness — and watch whether the panel twists during motion.
A torque hinge transfers resistance into the mounting structure, which means the screws, inserts, rivet nuts, weld nuts, frame thickness, and backing plates are part of the system. A hinge can be correctly rated but still fail if the panel or frame flexes. During sample testing, inspect the mounting points carefully for:
- Screw loosening or thread pull-out
- Hole deformation or cracking around the mounting area
- Panel flexing or frame bending
- Hinge leaf movement
- Need for washers, inserts, or backing plates
For OEM production, the hinge should be tested with the same fasteners intended for production. A sample mounted with temporary screws may pass early testing but fail later when the production fastener strategy changes.
Step 9: Include Gaskets, Cables, Latches, and Covers in the Test
Many torque hinge samples are tested on an empty prototype. That can produce misleading results. If the final product includes other forces around the hinge, include them in testing:
| Added Component | Why It Matters |
|---|---|
| Gasket | Adds compression force and closing resistance |
| Cable harness | Can pull against the panel or limit travel |
| Display cable | May affect motion smoothness |
| Latch | Changes closing behavior and alignment |
| Seal | Can increase opening force |
| Cover trim | Changes weight and center of gravity |
| Handle | Adds user load and abuse force |
| Gas spring removal | Changes how the lid is supported |
The hinge should be tested in the complete door system. A hinge that works before the gasket is installed may not feel right after gasket compression is added.
Step 10: Run a Basic Cycle Test
Cycle testing checks whether the hinge behavior changes after repeated use. The exact cycle requirement depends on the product, but the testing method should be realistic.
A basic sample test should include:
- Opening and closing through the full required angle
- Holding at the required service position
- Checking torque feel after repeated cycles
- Inspecting fasteners and mounting points
- Checking for noise, binding, or looseness
- Confirming panel alignment after cycling
For high-use products, ask the supplier what cycle-life validation is available and whether the hinge has been tested under similar load and geometry. Avoid approving a sample after only a few hand movements. A hinge can feel right at first and change after repeated use, especially if the mounting structure is weak or the load is near the limit.
Step 11: Test the Intended Environment
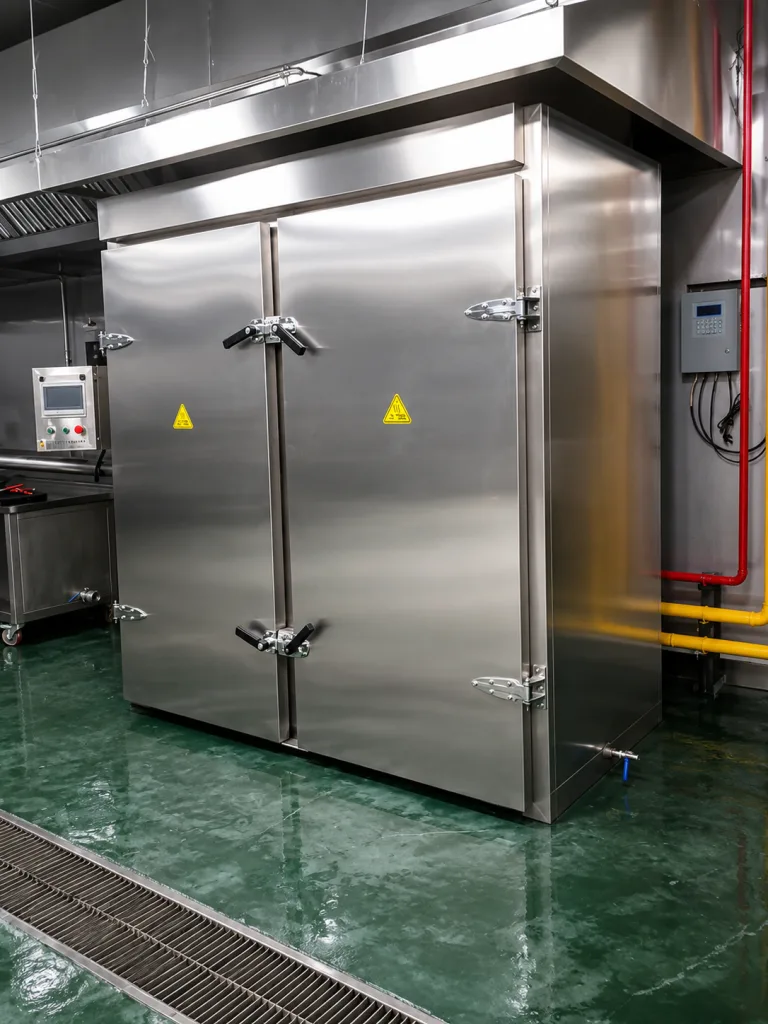
Environmental conditions can change hinge performance. A sample that works well in a clean office may behave differently in heat, cold, humidity, dust, washdown, vibration, or chemical exposure.
Depending on the product, test or review:
| Environment | What to Check |
|---|---|
| Heat | Torque change, material expansion, lubricant behavior |
| Cold | Stiffness, condensation, seal interaction |
| Humidity | Corrosion risk and smoothness |
| Dust | Knuckle wear and binding |
| Chemicals | Finish and material compatibility |
| Outdoor exposure | Corrosion, UV, water ingress, fastener compatibility |
| Vibration | Fastener loosening and drift |
| Medical or clean environment | Cleanability and surface finish |
Not every project needs a full environmental test before sampling, but high-risk environments should not be ignored. At minimum, buyers should tell the supplier the expected operating conditions before choosing a final sample.
Step 12: Record Results and Make the Approval Decision
OEM buyers should document sample testing so engineering, purchasing, quality, and suppliers are working from the same information. A simple torque hinge sample approval form can include:
| Test Item | Result |
|---|---|
| Product name or project code | |
| Hinge model tested | |
| Torque value or range | |
| Number of hinges used | |
| Panel weight | |
| Center of gravity distance | |
| Opening angle tested | |
| Required holding position | |
| Fastener type | |
| Mounting material | |
| User force feedback | |
| Cycle test result | |
| Environmental notes | |
| Pass, revise, or reject |
After testing, the team should make one of these decisions:
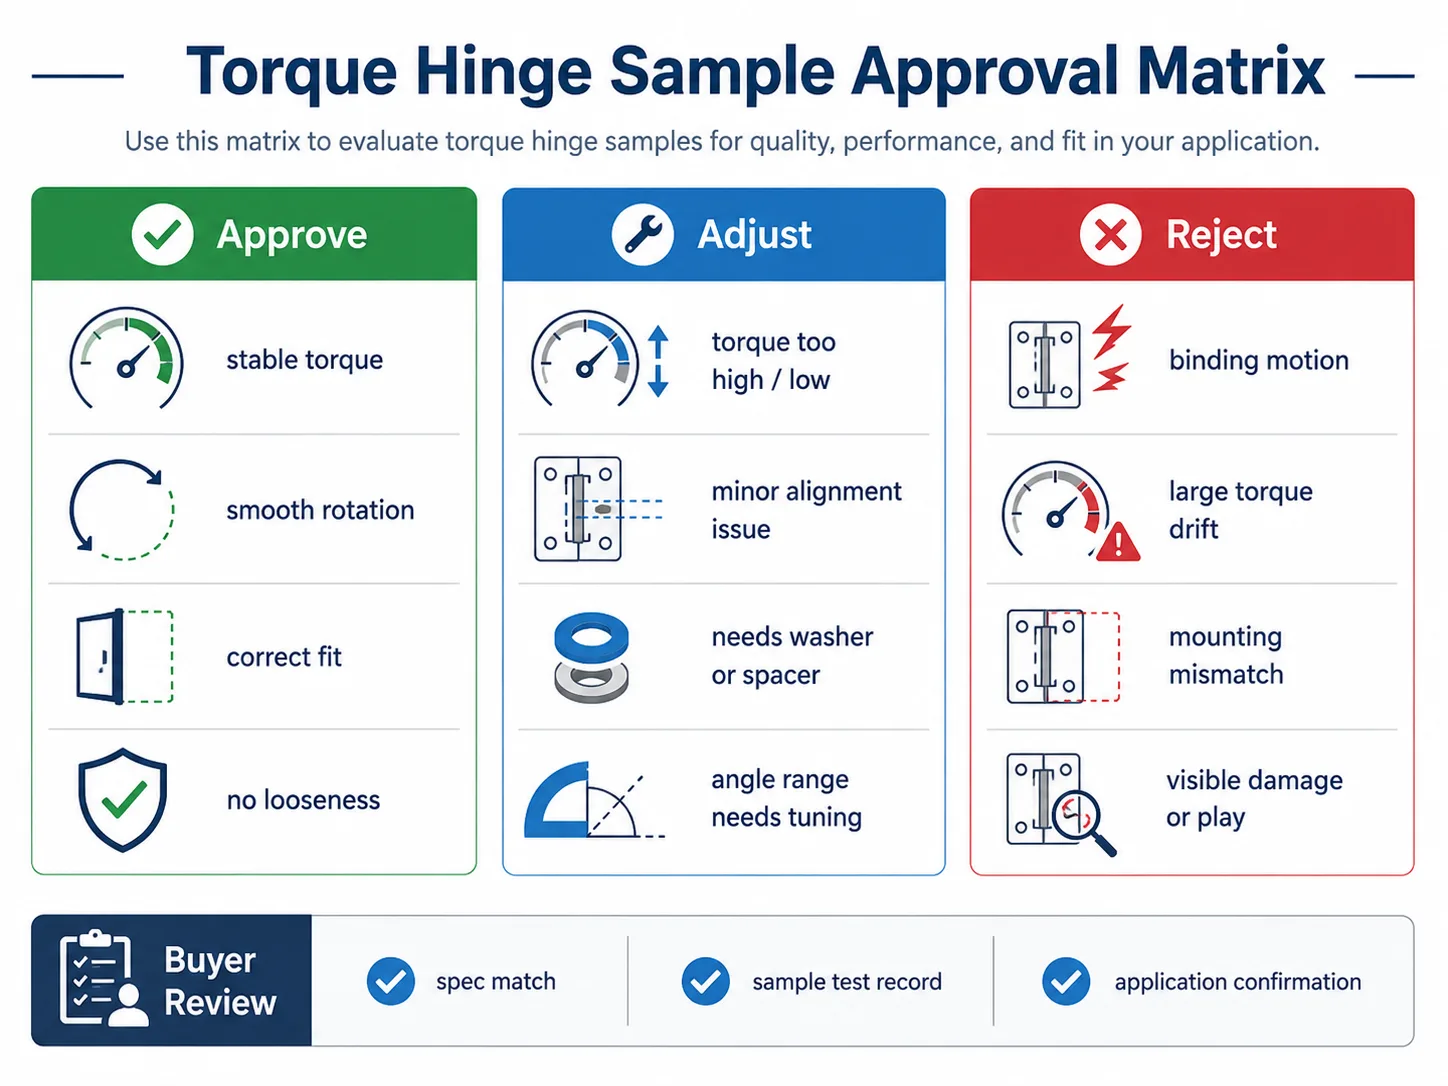
| Decision | Meaning | Next Step |
|---|---|---|
| Approve | Sample works in real geometry | Move to pilot run or production quote |
| Adjust | Torque is close but not ideal | Test another torque level or adjustable version |
| Retest | Geometry or product changed | Repeat with updated panel or mounting |
| Reject | Hinge does not meet function | Review different hinge type or support method |
Do not move to bulk order if the prototype is still changing significantly. If the panel weight, center of gravity, opening angle, gasket, cable path, or mounting method changes, the hinge test should be repeated.
Common Mistakes OEM Buyers Should Avoid
- Testing the hinge by hand only. A hinge that feels strong in your hand may not hold the real panel. Always test on the actual prototype or a representative fixture.
- Choosing by torque value alone. Torque value matters, but it does not capture panel geometry, center of gravity, mounting strength, user force, or fastener behavior.
- Ignoring center of gravity. Panel weight alone is not enough. The distance from the hinge axis to the center of gravity often determines whether the hinge can hold the panel.
- Using too much torque. Higher torque may hold the panel, but it can make the product difficult to open and unpleasant to use.
- Forgetting the gasket or cable harness. Gaskets, seals, cables, and latches can change how the panel moves. Test the complete system.
- Approving samples before production geometry is stable. If the design changes after sample approval, the hinge selection may no longer be valid.
RFQ Information to Send With a Torque Hinge Sample Request
A good RFQ helps the supplier recommend the right sample quickly. Instead of asking only for a price, send the application data.
| RFQ Information | Why It Matters |
|---|---|
| Product type | Helps identify hinge style |
| Door, lid, or panel size | Defines geometry |
| Panel weight | Needed for torque range |
| Center of gravity distance | Determines moment load |
| Opening angle | Defines motion range |
| Required hold positions | Determines free-stop need |
| Number of hinges planned | Affects total torque |
| Mounting surface material | Affects fastener strategy |
| Panel thickness | Affects installation method |
| Environment | Guides material and finish |
| Expected cycle count | Supports durability review |
| Sample quantity | Helps prepare testing set |
| Future order quantity | Supports OEM pricing |
| Drawing or CAD file | Reduces selection errors |
If exact values are not available, provide estimates and clearly mark them as estimates. The supplier can often recommend sample torque levels for testing, but the final approval should still come from prototype validation.
Recommended Sample Testing Workflow
For OEM projects, use this practical workflow:
- Define the application and required motion.
- Record panel weight and center of gravity.
- Confirm opening angle and hold positions.
- Select two or three sample torque levels.
- Mount samples on the real prototype or representative fixture.
- Test holding, drift, user force, and smoothness.
- Check fasteners, panel flex, and hinge spacing.
- Include gaskets, cables, latches, and real accessories.
- Run basic cycle testing.
- Review environmental exposure.
- Document the results.
- Approve, adjust, or retest before bulk order.
This workflow helps engineering and procurement make decisions together. It also gives the supplier better information if changes are needed.
Frequently Asked Questions
How many torque hinge samples should an OEM test?
Most OEM buyers should test at least two or three torque levels when the application is new or the final panel weight is uncertain. A lower, target, and higher torque sample helps the team compare holding strength, user force, and motion feel before production approval.
Can I approve a torque hinge sample by testing it by hand?
No. Hand testing can give a first impression, but it cannot approve the hinge for production. The hinge should be mounted on the real panel or a representative fixture with the correct weight, opening angle, fasteners, and hinge spacing.
What information does a supplier need before recommending a torque hinge sample?
A supplier needs the panel size, panel weight, center of gravity distance, opening angle, required holding position, number of hinges, mounting surface material, panel thickness, environment, expected cycle count, and future order quantity. A drawing or CAD file is also helpful.
Why does center of gravity matter for torque hinge testing?
Center of gravity determines how much moment load acts around the hinge axis. Two panels with the same weight can need different torque if one has its mass farther from the hinge line. That is why panel weight alone is not enough for selection.
What should I do if the sample holds the panel but feels too stiff?
Test a lower torque level or an adjustable torque hinge. Holding strength is only one part of approval. The hinge also needs to provide a comfortable and predictable opening force for the real user.
When should an OEM retest torque hinge samples?
Retest when the panel weight changes, the center of gravity shifts, the opening angle changes, the hinge spacing changes, the gasket or cable path is added, or the mounting fastener strategy changes. Any major geometry change can affect hinge performance.
Need Help Testing Torque Hinge Samples?
If your project involves a lid, access cover, display, control panel, medical device, or equipment door that must hold position without drifting, HTAN can help review the sample test requirements before production. Share the panel size, weight, center of gravity, opening angle, mounting structure, required hold positions, sample quantity, and future production plan, and our engineering team can recommend a torque range, hinge type, sample set, and testing approach for your application. Browse our torque hinge range or contact HTAN to start a sample review.