Five Common Issues with Weld-On Hinges and Quick Solutions
Weld-on hinges are critical components for industrial doors, metal gates, and equipment cabinets. They securely connect door panels to frames via welding, providing strong support and safety. Proper hinge installation ensures stability and smooth operation. However, despite their reputation for durability, poor installation or low-quality products can still cause major issues. For example, welding misalignment during installation may lead to sticking doors, premature hinge wear, or other complications. Before exploring quick fixes, let’s examine the most common challenges faced by weld-on hinge users.
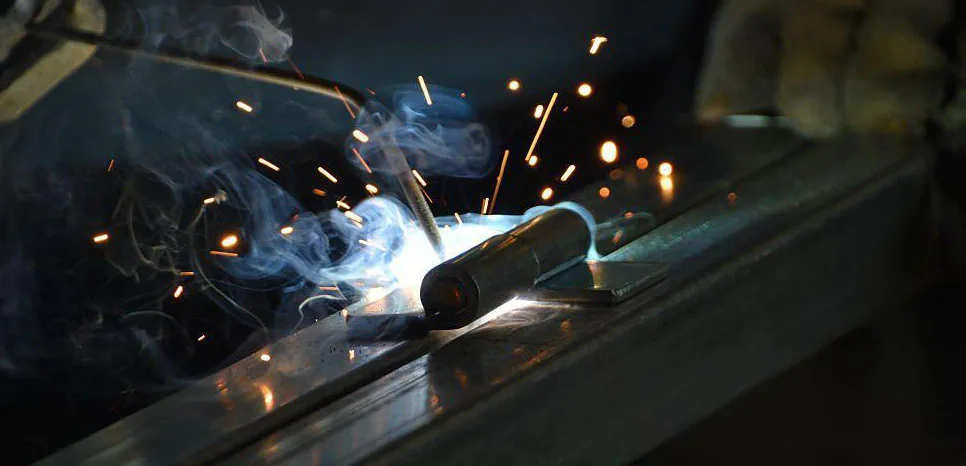
Weld-on hinge welding scenario
Issue 1: Poor Hinge Alignment
Symptoms: Newly installed doors fail to open and close smoothly, sometimes jamming or rubbing against the frame. The door may sag unevenly or resist operation.
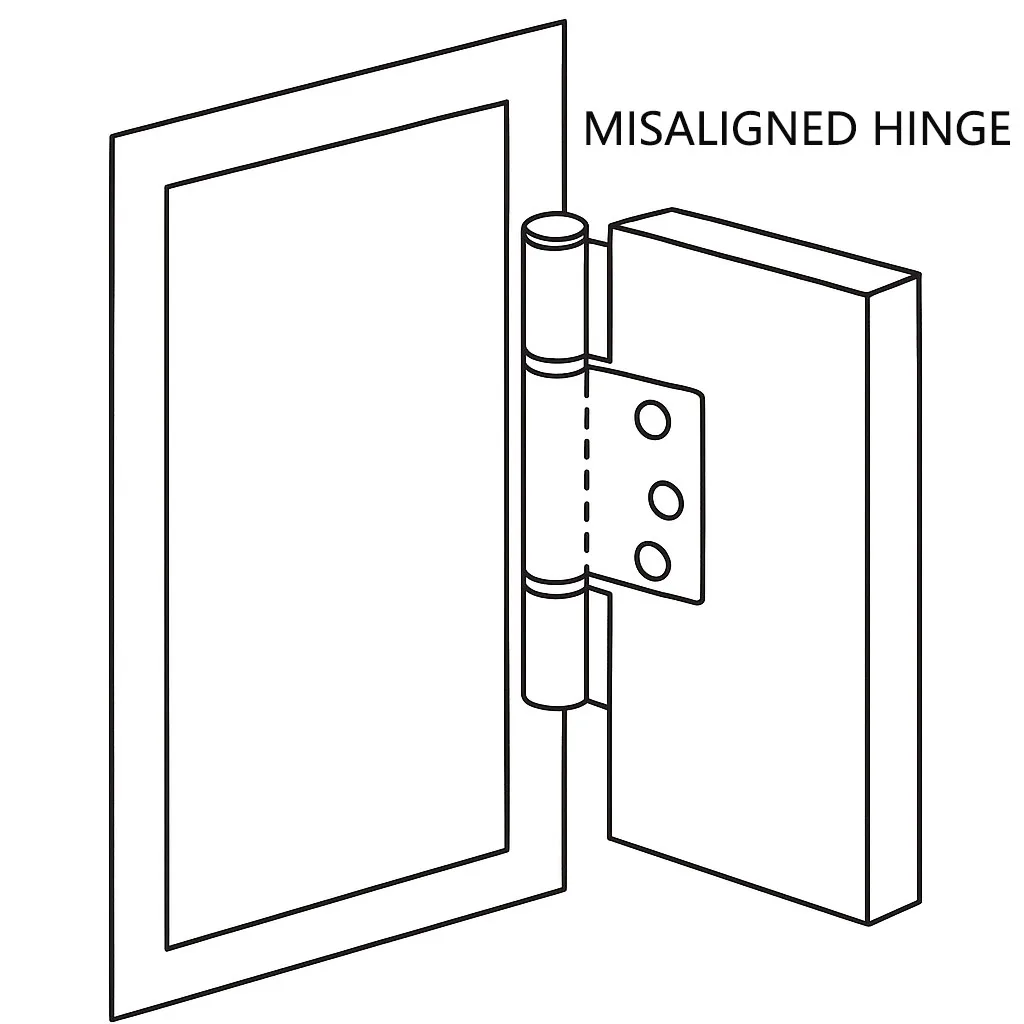
misaligned weld-on hinge installation
Causes: Misalignment during welding is usually the culprit. Common reasons include inaccurate marking or measurement, not using a level or clamps, or an uneven or warped door frame or panel. These factors cause hinge height or angle deviations.
Impact: Misalignment puts uneven loads on hinges, increasing friction and stress. This accelerates wear, shortens hinge lifespan, and can even lead to sagging or detachment.
Solutions:
- Use a laser level or spirit level with clamps to secure hinge positions and mark points precisely.
- Perform a spot-weld trial assembly before final welding: secure the hinge with small tack welds, test the door’s movement, and adjust if needed.
- Check the flatness of both door frame and panel, keeping them level during installation to minimize shear forces.
- When installing weld-on hinges, avoid creating horizontal planes on the hinge leaf where water can pool. Slightly tilt the leaf to facilitate drainage, and avoid welding at low points on door frames prone to water accumulation. Proper configuration allows rainwater to flow away quickly, reducing prolonged water contact at joints.
- Install drainage holes or small gaps at critical points on hinges or door panels to facilitate natural moisture escape. For areas prone to rain exposure, consider adding rain guards or similar protective devices.
Once alignment is corrected, focus on weld quality.
Issue 2: Insufficient or Uneven Weld Strength
Symptoms: Hinges loosen during use, cracks appear at weld points, or hinges fail to support expected loads.
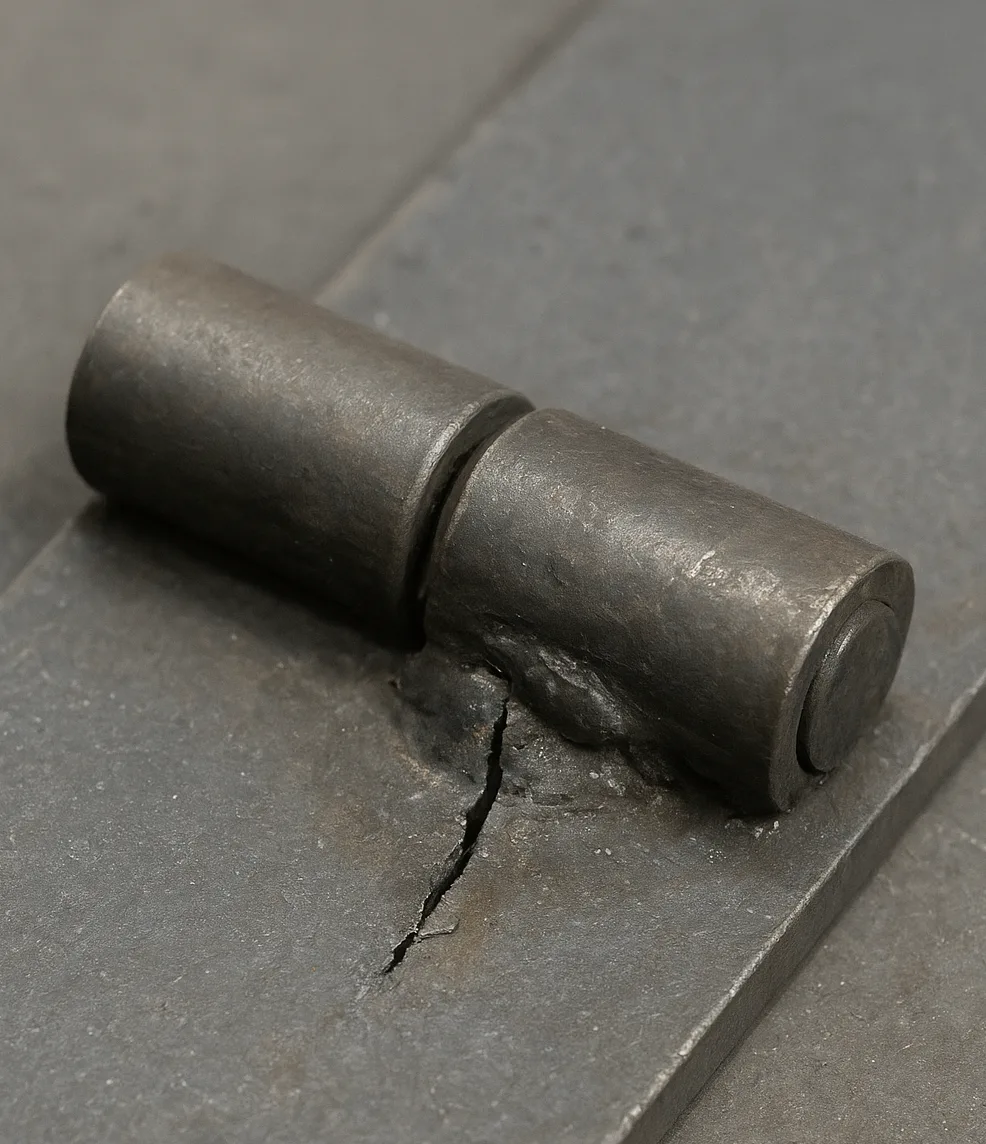
Illustration of cracked or defective weld joints
Causes: Weak welds result from:
- Choosing the wrong welding method.
- Inadequate surface preparation, such as oil, rust, or paint left on the surface.
- Poor control of welding parameters or limited operator experience.
Impact: Weak welds are serious safety hazards. Hinges may loosen or fracture, risking door collapse. This issue is particularly dangerous for permanently attached weld-on hinges, since they cannot be easily removed and re-secured like bolt-on alternatives.
Solutions:
- Select the proper welding method, such as MIG for thick steel and TIG for stainless steel or thin materials.
- Clean surfaces thoroughly by removing oil, rust, and coatings before welding. Grind the surface to a smooth finish and ensure it is contamination-free to facilitate full fusion between the weld metal and base material.
- For heavy doors, use multi-pass welding to reduce stress and improve strength.
- Rely on skilled welders, controlling current, voltage, and speed carefully. Inspect welds visually or with non-destructive testing.
For OEM projects that require formal review of welding method, base material, tolerance, and production consistency, see our weld-on industrial hinges OEM guide.
Post-Welding Protection for Weld Zones
The welding process itself creates corrosion vulnerability. High heat alters the metal’s crystal structure and destroys the passivation layer that normally protects stainless steel. The heat-affected zone around welds becomes chemically depleted of chromium, a key element providing corrosion resistance, making it the corrosion hotspot of the hinge. This explains why even stainless steel weld-on hinges can rust at seams despite their general corrosion resistance.
To protect weld zones effectively:
- Immediately after welding, grind the weld to remove spatter and scale, then thoroughly clean the weld surface.
- Apply rust-inhibiting primer promptly after cleaning and cure it properly. If necessary, seal the weld further by applying sealant or rust-inhibiting oil along the edges.
- For stainless steel welds, pickling and passivation can help restore the corrosion-resistant passive film.
Even with solid welds and proper post-weld treatment, environmental exposure introduces another issue: corrosion.
Issue 3: Corrosion and Rust Accumulation
Symptoms: Rust spots form, hinges operate stiffly, squeak, and lose visual appeal and functionality.

Rust on metal surfaces
Understanding Why Weld-On Hinges Rust
Outdoor exposure accelerates oxidation if hinges lack protective coatings. Ordinary carbon steel corrodes quickly, while welding heat zones or small cracks at seams become rust initiation points. Neglecting cleaning and lubrication worsens corrosion. Several environmental factors accelerate this process:
- Continuous exposure to moisture and oxygen: Persistent humidity or rainfall accelerates electrochemical corrosion reactions.
- Acid rain and industrial pollutants: Mildly acidic rainwater can speed up oxidation on untreated steel surfaces.
- Salt spray and coastal environments: Chlorides disrupt protective films and promote pitting, even on some stainless steels.
- Dust, grime, and trapped moisture: Surface contamination traps water and creates localized corrosion cells.
- Temperature fluctuations and freeze-thaw cycles: Condensation and micro-cracking can accelerate deeper corrosion over time.
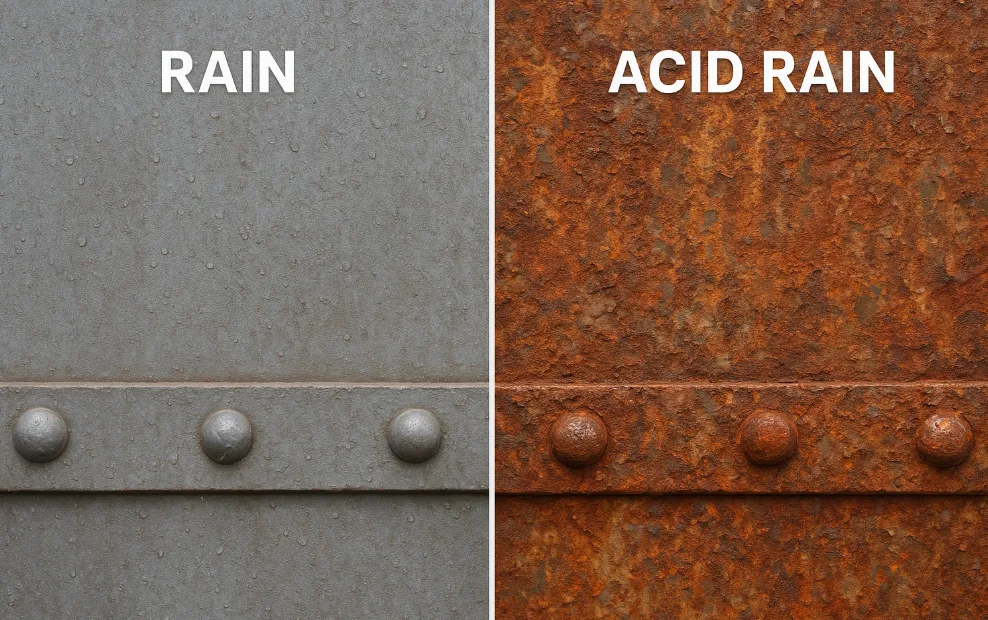
Comparison image of metal surface corrosion caused by acid rain in industrial areas
Impact: Rust hinders hinge rotation, damages welds, and may weaken the surrounding structure.
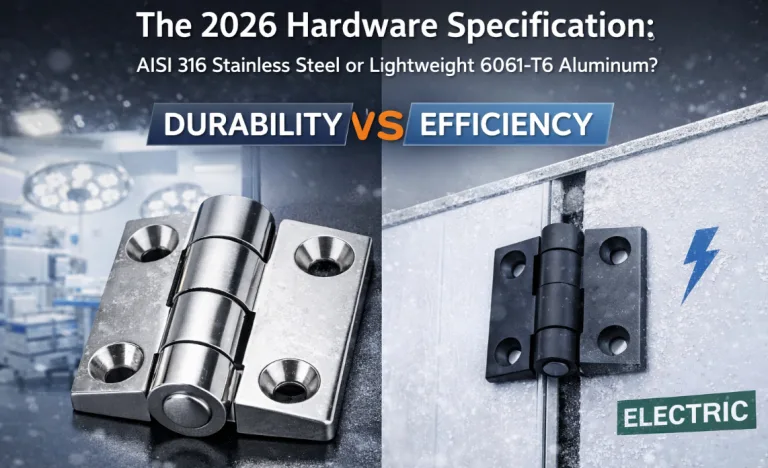
Selecting Rust-Resistant Materials
Choosing the right material is the first line of defense against corrosion:
- Stainless steel (304, 316): Inherently resists rust. Molybdenum-containing 316 stainless steel is preferred for coastal or high-humidity environments.
- Carbon steel + anti-rust coating: Offers high strength and low cost for heavy-duty applications but requires galvanizing or powder coating.
- Galvanized steel: Uses a zinc layer to improve corrosion resistance, especially in outdoor service.
- Aluminum alloy: Lightweight and corrosion resistant, but generally less suitable for heavy structural loads.
Surface treatment matters just as much as base metal. Powder coating, zinc-rich primers, and multi-layer paint systems all extend the service life of weld-on hinges used outdoors.
Rust Prevention Recommendations by Environment

Rust Prevention Recommendations for Different Environments
- Coastal areas: Prioritize 316 stainless steel, sealed welds, and regular lubrication.
- High-temperature environments: Use heat-resistant materials or coatings, and avoid standard galvanizing in extreme heat.
- Rain and snow regions: Combine galvanizing with a robust coating system and periodic inspection.
- Outdoor fences and gates: Ensure quality welding and apply a durable protective finish with proper drainage clearance.
Corrosion is not the only cause of hinge failure. Incorrect load capacity also leads to serious problems.
Issue 4: Mismatched Load Capacity
Symptoms: Large or heavy doors sag, open with difficulty, or cause hinge failure.
Causes: Using undersized hinges, miscalculating door weight, or installing too few hinges. Two hinges are often insufficient for tall or heavy doors, resulting in uneven stress distribution.
Impact: Excessive stress causes hinge cracks, weld failure, and unsafe door sagging.
Solutions:
- Calculate door weight and select hinges that meet load-bearing specifications. Use at least one hinge per 30 inches (approximately 75 cm) of door height as a starting point.
- Increase hinge count for heavy or tall doors. Adding a third or fourth hinge distributes weight more evenly.
- Consult hinge suppliers or engineers for accurate selection based on material, size, and frequency of use. Understanding weld-on vs bolt-on hinges can also help you determine which type best supports your door’s weight and usage requirements.
If the application involves large steel gates, thick equipment doors, or repeated high-load cycling, review our heavy-duty hinges guide before final hinge selection.
Even with the right hinges, performance will decline without proper upkeep.
Issue 5: Lack of Regular Maintenance
Symptoms: Hinges become noisy, sluggish, or even seize up after long use.
Causes:
- Lack of lubrication, causing metal-to-metal wear.
- Loose fasteners or weld points.
- Dust and moisture buildup in outdoor environments.
Impact: Neglect accelerates wear, corrosion, and fatigue, shortening lifespan and creating safety hazards.
Regular Inspection and Cleaning
Periodically check hinge surfaces for rust spots, cracks, or peeling coatings. Use a neutral cleaner and a soft cloth or brush to remove dust, salt deposits, and other contaminants. For minor rust stains, gently sand the surface with fine-grit sandpaper or a wire brush, then wipe clean with a dry cloth. After cleaning, apply rust inhibitor or rust-proof oil to maintain a thin protective film on the metal. For areas with peeling coatings or localized paint loss, promptly touch up with rust-proof paint to prevent corrosion from spreading.
Lubrication and Rust-Proof Oil Maintenance
Inspect and lubricate hinges quarterly or semi-annually, every 3 to 6 months in industrial settings. Increase frequency in humid or high-use conditions. Use water-resistant synthetic lubricants such as lithium-based grease or PTFE-containing sprays. These form a durable moisture barrier on hinge pins and contact areas. Wipe off excess grease after lubrication to avoid dust adhesion.
Rust Removal Methods
For surface rust spots, use the following methods based on severity:
- Light surface rust: Use fine-grit sandpaper or a wire brush to remove corrosion, then re-prime and repaint the area.
- Moderate rust: Use a rotary tool or angle grinder with a flap disc, then apply a zinc-rich primer before repainting.
- Severe or deep rust: If corrosion has compromised structural integrity, cut off the hinge, re-prepare the mounting surface, and weld on a new hinge.
Preventing Rust Regrowth After Treatment
Removing rust is only half the battle. Preventing its return is equally important:
- Never leave bare metal exposed after rust removal. Apply primer within hours.
- Use a multi-layer coating system: rust-inhibiting primer, intermediate barrier coat, and UV-resistant topcoat.
- Apply rust-proof oil or wax to hinge pins and pivot points as a secondary moisture barrier.
- Schedule follow-up inspections 30 and 90 days after treatment to verify the repair is holding.
Recommended Maintenance Schedule
Consistent maintenance prevents most hinge failures. Follow this schedule based on your environment:
| Task | Indoor / Mild Climate | Outdoor / Humid / Coastal | Industrial / Heavy Use |
|---|---|---|---|
| Visual inspection | Every 12 months | Every 6 months | Every 3 months |
| Lubrication | Every 12 months | Every 6 months | Every 3 months |
| Cleaning (dust, salt, debris) | Every 12 months | Every 6 months | Every 3 months |
| Coating inspection & touch-up | Every 24 months | Every 12 months | Every 6 months |
| Full repainting / recoating | Every 5–7 years | Every 3–5 years | Every 2–3 years |
| Weld joint inspection | Every 24 months | Every 12 months | Every 6 months |
For applications with repeated opening cycles, maintenance planning should also be checked against industrial hinge cycle life testing requirements.
Quick Reference: 5 Common Issues at a Glance
| Issue | Primary Cause | Key Solution |
|---|---|---|
| Poor alignment | Inaccurate measurement or unlevel frame | Use laser level, tack-weld first, test before final weld |
| Weak welds | Wrong method, dirty surface, poor technique | Match welding method to material, clean surfaces, use skilled welders |
| Corrosion / rust | Moisture, salt, chemical exposure | Choose corrosion-resistant material, apply protective coatings, maintain regularly |
| Load mismatch | Undersized or too few hinges | Calculate door weight, increase hinge count, consult supplier |
| Lack of maintenance | No lubrication, no inspection routine | Follow scheduled lubrication, cleaning, and coating touch-ups |
FAQ
How do I fix a misaligned weld-on hinge without removing it?
If the misalignment is minor, you can grind the existing weld, reposition the hinge slightly using clamps and a level, and re-weld. For severe misalignment, it is safer to cut the hinge off completely, re-prepare the surface, and weld a new hinge in the correct position.
What type of lubricant is best for outdoor weld-on hinges?
Use water-resistant synthetic lubricants such as lithium-based grease or PTFE (Teflon)-containing spray lubricants. These form a durable protective film that resists moisture, salt spray, and dust, keeping the hinge operating smoothly between maintenance intervals.
How many weld-on hinges do I need for a heavy steel gate?
A general guideline is one hinge per 30 inches (approximately 75 cm) of door height. For doors exceeding 200 lbs (approximately 90 kg), use at least three heavy-duty hinges. Always verify with the hinge manufacturer’s load rating and consider factors like door thickness, usage frequency, and wind load.
Can I weld stainless steel hinges to a carbon steel frame?
Yes, but it requires special attention. Use appropriate filler metals (such as 309L stainless steel welding rod) designed for dissimilar metal joints. Be aware that the junction between stainless and carbon steel is prone to galvanic corrosion, so apply protective coatings or sealant at the weld zone after installation.
How often should I inspect weld-on hinges in a coastal environment?
In coastal or high-humidity environments, inspect hinges every 6 months. Check for rust spots, coating damage, weld cracks, and lubrication condition. Touch up any coating damage immediately and re-lubricate all moving parts during each inspection.
Conclusion
Most weld-on hinge problems, including misalignment, weak welds, corrosion, load mismatch, and neglected maintenance, are preventable with the right approach. Precise installation, proper welding technique, corrosion-resistant materials, correct load calculations, and a consistent maintenance schedule will keep your hinges performing reliably for years.
The key takeaway is simple: invest time in proper installation and ongoing care rather than dealing with costly repairs or replacements later. If you are unsure about material selection, load requirements, or installation methods for your specific project, contact our engineering team for personalized guidance.