

Hinge Quality Starts Before Surface Treatment Begins
It is tempting to judge a hinge by its finish. A bright chrome or an even powder coat looks like quality, and a dull or patchy one looks like a problem. But by the time a hinge reaches the plating or coating line, much of its quality has already been set. The finish can only be as good as the part underneath it — and a good-looking coating on a flawed blank is often a defect waiting to appear.
This guide explains why much of an industrial hinge’s finish quality is determined before surface treatment begins, and what actually determines it: the base material, the forming, the deburring and cleaning, and the pre-treatment. It is written for engineers and buyers who want to look past the shine and judge the part that matters — because understanding this is what lets you tell a hinge that will last from one that only looks the part on delivery day.
Summary: Quality Comes Before the Finish
Much of an industrial hinge’s finish quality is determined before surface treatment because the finish cannot fix what is already wrong underneath. The base material’s grade and soundness, the accuracy and cleanliness of the forming, the removal of burrs and sharp edges, and the thoroughness of pre-treatment cleaning all decide how well a coating adheres and how the part performs. A flaw in the blank — a crack, a burr, an oxide layer, or an oily surface — will show through the finish or cause it to fail early. The shine is the last step, not the source of quality.
Why the Finish Can Only Reveal Quality, Not Create It
Surface treatment does two jobs on most industrial hinges: it protects the metal from corrosion and it makes the part look finished. What a decorative plating or a protective coating cannot do is correct a poor dimension, close internal porosity, heal a crack, or make up for insufficient section thickness. (Some specialized surface-hardening processes, such as nitriding or hard chrome, do change surface properties — but the plating and powder coating used on most hinges are protective and cosmetic layers, not structural ones.) A coating is a thin layer that follows the shape of whatever it is applied to — including every defect.
This is why a good finish on a bad blank is a trap. The part looks acceptable on delivery, passes a quick visual check, and then fails in ways that trace straight back to what was under the coating: the plating flakes off where the surface was not clean, rust weeps from a spot where a burr broke the coating, or the finish looks uneven where the metal underneath was scratched or oxidized. The finish did not cause these problems; it revealed them. Judging quality by the shine alone means judging only the final visible stage while ignoring the manufacturing steps underneath it.
The Four Things That Decide Quality Before Finishing
Four stages, all completed before a part reaches the plating or coating line, set the quality the finish can only preserve or reveal. Each one is a place where a hinge is quietly made good or bad.
1. Base Material
The grade and soundness of the metal. Cracks, inclusions, or the wrong grade are flaws no coating can hide.
2. Forming
The accuracy of stamping, casting, and bending. Scratches, tool marks, and porosity carry through to the finished surface.
3. Deburring
Removing burrs and sharp edges. A burr breaks a coating at its weakest point and starts corrosion there.
4. Pre-Treatment
Cleaning off oil, oxide, and residue. A coating on a dirty surface will not bond and peels early.
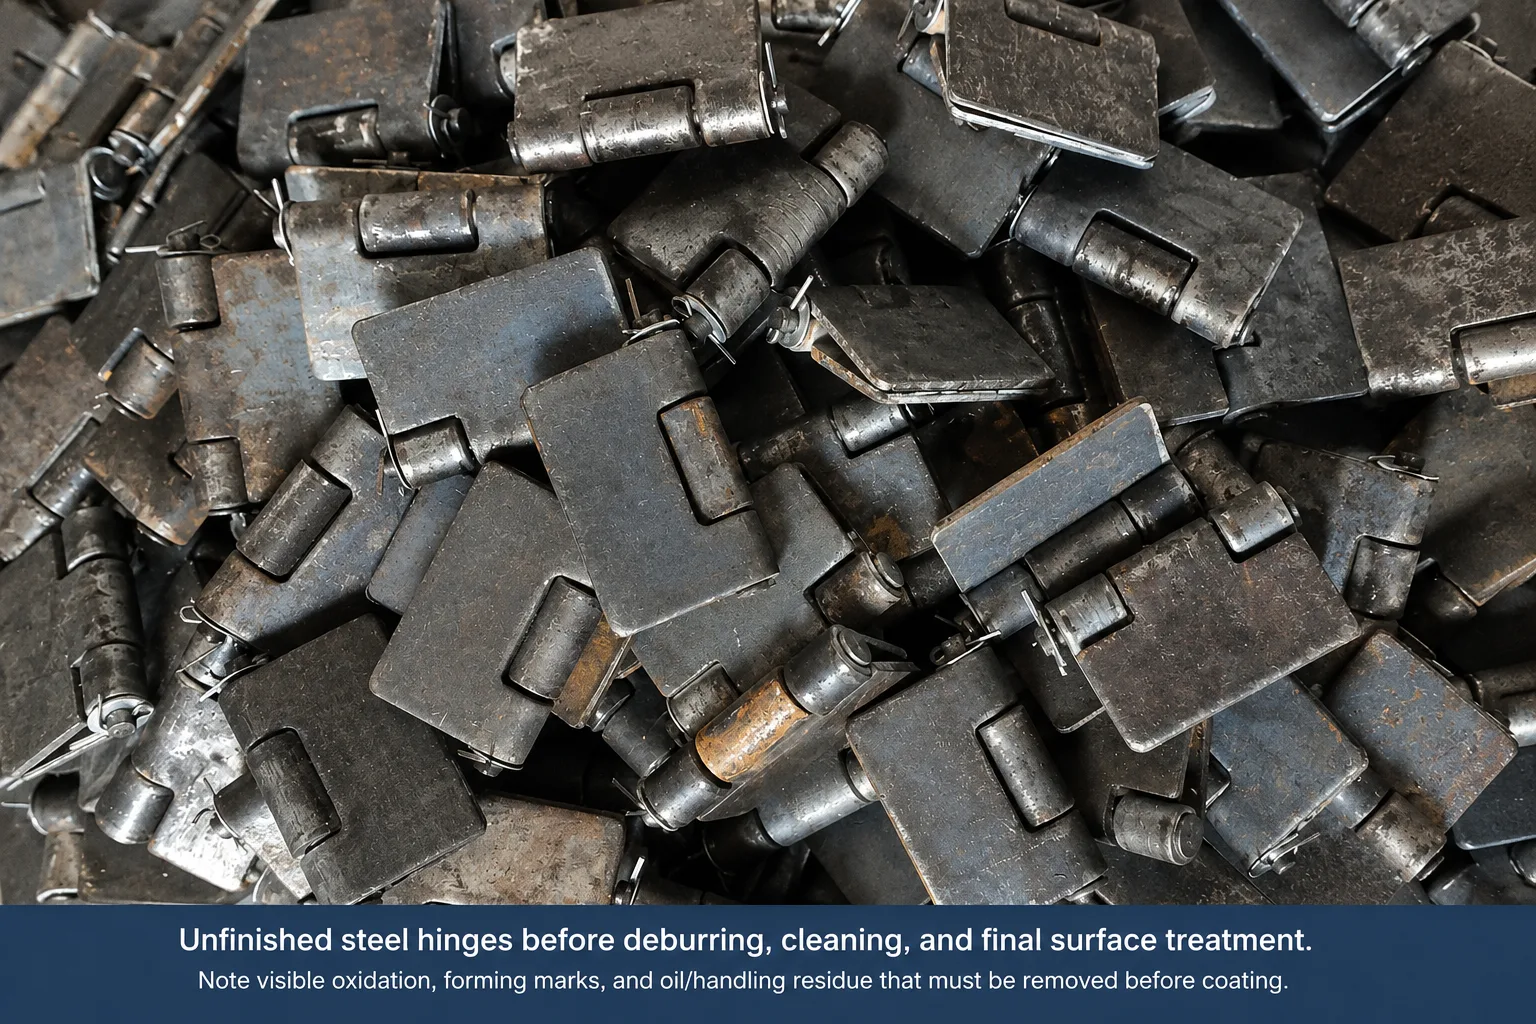
Stage 1: The Base Material Sets the Ceiling
Everything starts with the metal, and the metal sets a ceiling on how good the hinge can be. A coating applied over a sound, correctly chosen material preserves a good part; a coating applied over a flawed or wrong material only postpones the moment the flaw appears.
Two things matter here. The first is the grade: 304 stainless behaves differently from 316, carbon steel differently from a zinc alloy, and using a lower grade than the environment demands is a flaw the finish cannot correct. The second is soundness: hidden defects inside the metal — hairline cracks, inclusions, or porosity from a poor cast — are weak points that no plating or coating can strengthen. A hinge cast with internal porosity can be plated to a mirror shine and still fracture under load, because the finish never touched the flaw that mattered.
| Base-Material Flaw | Most Relevant Process | How It Shows Later | Finish Fix? |
|---|---|---|---|
| Wrong grade for the environment | Material selection | Corrosion despite a good coating | No |
| Internal porosity or inclusions | Casting, die-casting | Fracture or weakness under load | No |
| Hairline cracks | Bending, stamping | Failure at the crack, rust ingress | No |
| Thinner gauge than specified | Material / stock | Bending, sagging, hole tear-out | No |
The takeaway for a buyer is that material is the first quality question, not the last. Confirming the grade, the gauge, and — where it matters — the material soundness is worth more than any assurance about the finish, because these are the flaws a beautiful coating is best at hiding.
Stage 2: Forming Quality Carries Through the Finish
Once the material is chosen, the way it is formed leaves a surface the finish will faithfully copy. Coatings are thin and conformal — they follow the contour of the metal exactly — so whatever the forming leaves behind, the finish preserves.
What Forming Defects Do to the Final Finish
- Tool marks & scratches — visible through plating as lines and dull spots
- Stamping burrs — sharp edges where coating thins and breaks
- Casting porosity — pinholes and blotches that show after plating
- Mill scale & oxide — poor adhesion if not removed first
A mirror finish typically requires grinding and polishing before the final surface process, while a rougher finish may retain more visible forming marks unless its texture is intentionally specified and controlled. On a plated part especially, the finish amplifies what is underneath: bright plating makes every scratch and pinhole more visible, not less. Good forming, followed by proper surface preparation such as grinding or polishing, is what gives the finish a clean surface to preserve.
Stage 3: Deburring — The Small Step That Decides Corrosion
Deburring sounds minor, but it is one of the most important quality steps on the whole part, because a burr is exactly where a coating fails and corrosion begins. When metal is stamped, drilled, or machined, it leaves sharp raised edges — burrs — at the cut lines and hole edges.
A coating cannot cover a sharp edge evenly. It thins out over the peak of a burr the way paint thins over a sharp corner, leaving the least protection exactly where the metal is most exposed. That thin spot is often where corrosion starts, and because it is at an edge or a hole, it is frequently where the hinge is also mechanically stressed. Edge coverage matters most in salt, moisture, and outdoor exposure, where a scratch or thin spot at an edge can become a point of failure — a risk our guide to powder-coated versus stainless steel hinges discusses in the context of coating choice. Removing burrs and breaking sharp edges before finishing gives the coating a rounded surface it can cover evenly, which is one clear sign of a quality-focused manufacturer.
Why it matters: A coating is thinnest exactly at a sharp burr or edge — the same place the metal is most exposed and most stressed. Deburring before finishing reduces the risk of corrosion beginning around holes and cut edges.
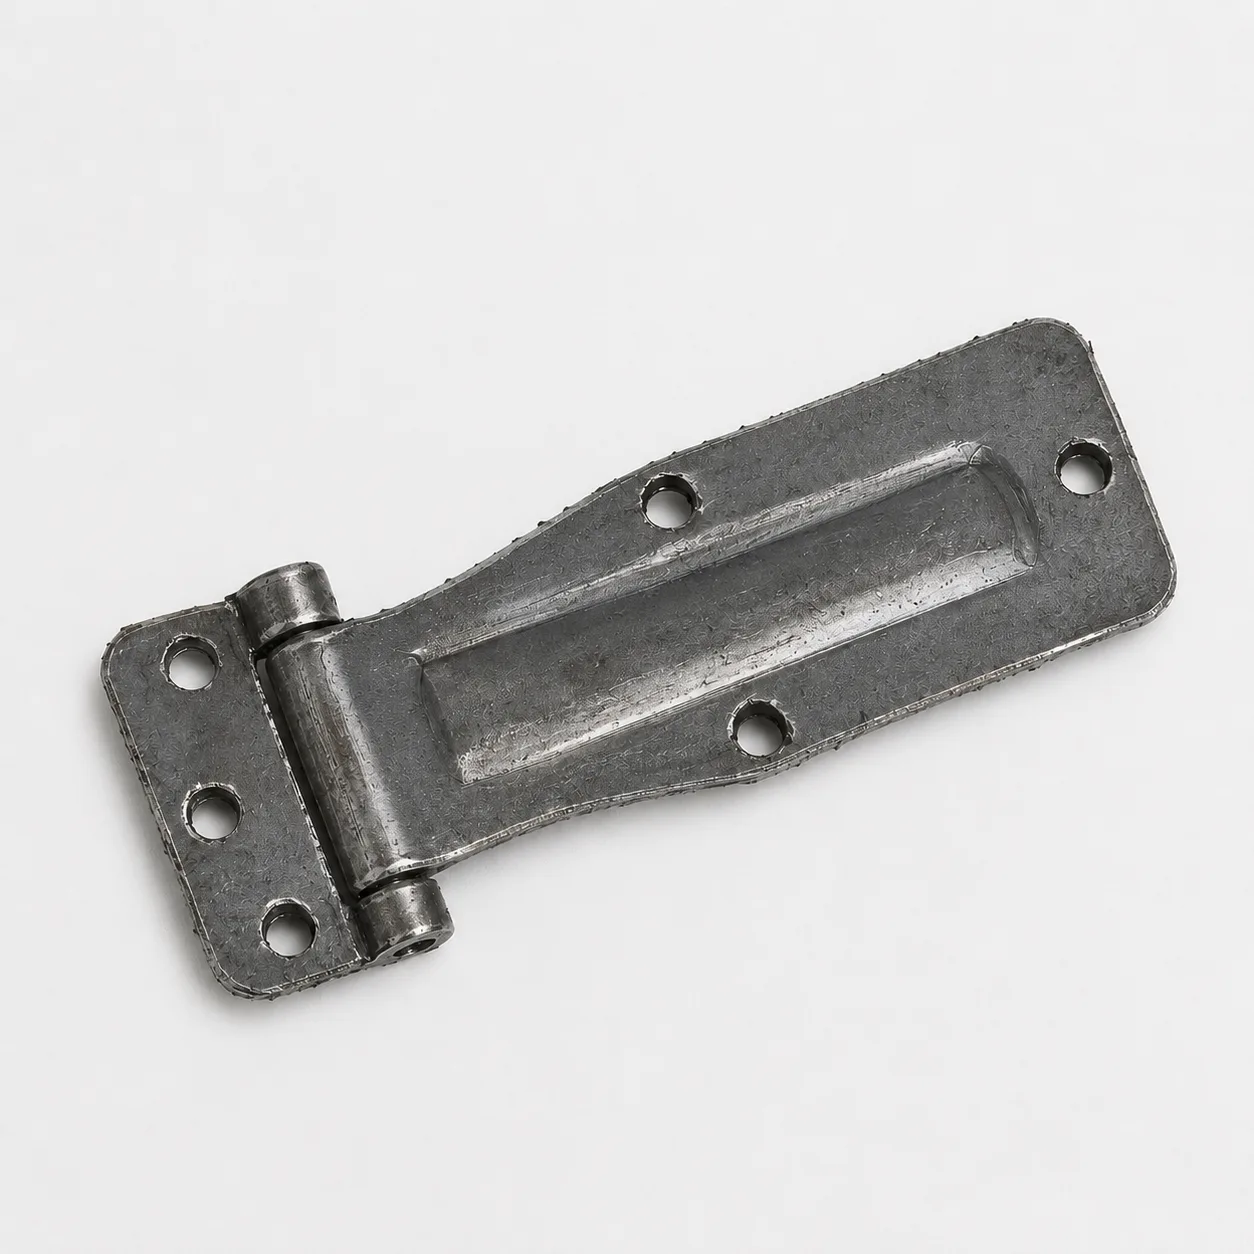
Stage 4: Pre-Treatment — Why Clean Metal Is Everything
The final stage before finishing is pre-treatment: cleaning the part so the coating can actually bond to it. This is the step buyers never see and rarely ask about, yet it is one of the most common reasons coatings peel, blister, and fail early.
A coating bonds to the metal, not to the oil, oxide, or residue sitting on top of it. If a part goes into plating or powder coating with cutting oil, fingerprints, mill scale, or forming residue still on the surface, the coating bonds to that contamination instead of the metal — and when the contamination lets go, the coating goes with it. This is why proper pre-treatment involves a sequence of steps: degreasing to remove oils, removing oxide or scale, rinsing, and activating the surface so the coating can grip. Skip or rush any of it and the finish is compromised before it is even applied.
| Pre-Treatment Step | What It Removes | What Happens If Skipped |
|---|---|---|
| Degreasing | Oils, cutting fluid, fingerprints | Coating will not bond; peels and blisters |
| Descaling / pickling | Mill scale, oxide layer | Poor adhesion; finish flakes off |
| Rinsing | Chemical residue from cleaning | Spots, stains, and weak spots in the coating |
| Activation | Prepares a bondable surface | Coating grips poorly and lifts early |
The exact pre-treatment sequence depends on the substrate and finish system. Not every hinge requires every step listed above; the process should be matched to the base metal, coating chemistry, and required service environment.
The reason this stage is invisible is also why it is where cost is most easily cut. A rushed or shortened pre-treatment is not visible on delivery — the part looks perfectly coated — but it is a common cause of a finish that may peel prematurely in service. When a coating fails early and lifts off cleanly, poor pre-treatment is one of the first things to check, though cure conditions, coating compatibility, film thickness, and mechanical damage can also be involved.
How Much the Finish Reveals Depends on the Coating
Not every finish reveals what is underneath to the same degree. Some coatings magnify every flaw in the blank; others hide minor ones for a while. Knowing which is which tells you how carefully the stages before finishing had to be controlled for a given part.
| Surface Process | How It Reacts to a Flawed Blank | Pre-Finish Demand |
|---|---|---|
| Bright / decorative plating | Magnifies every scratch, pinhole, and burr | Highest — surface must be near-perfect first |
| Passivation (stainless) | Does not build a covering film like coating or plating; cleans and restores the surface, so any flaw stays visible | High — relies entirely on clean, sound metal |
| Powder coating | Hides minor marks but breaks over burrs and dirt | Moderate — still fails without deburring and cleaning |
| Zinc plating (functional) | Covers some cosmetics but not adhesion problems | Moderate — pre-treatment still decides adhesion |
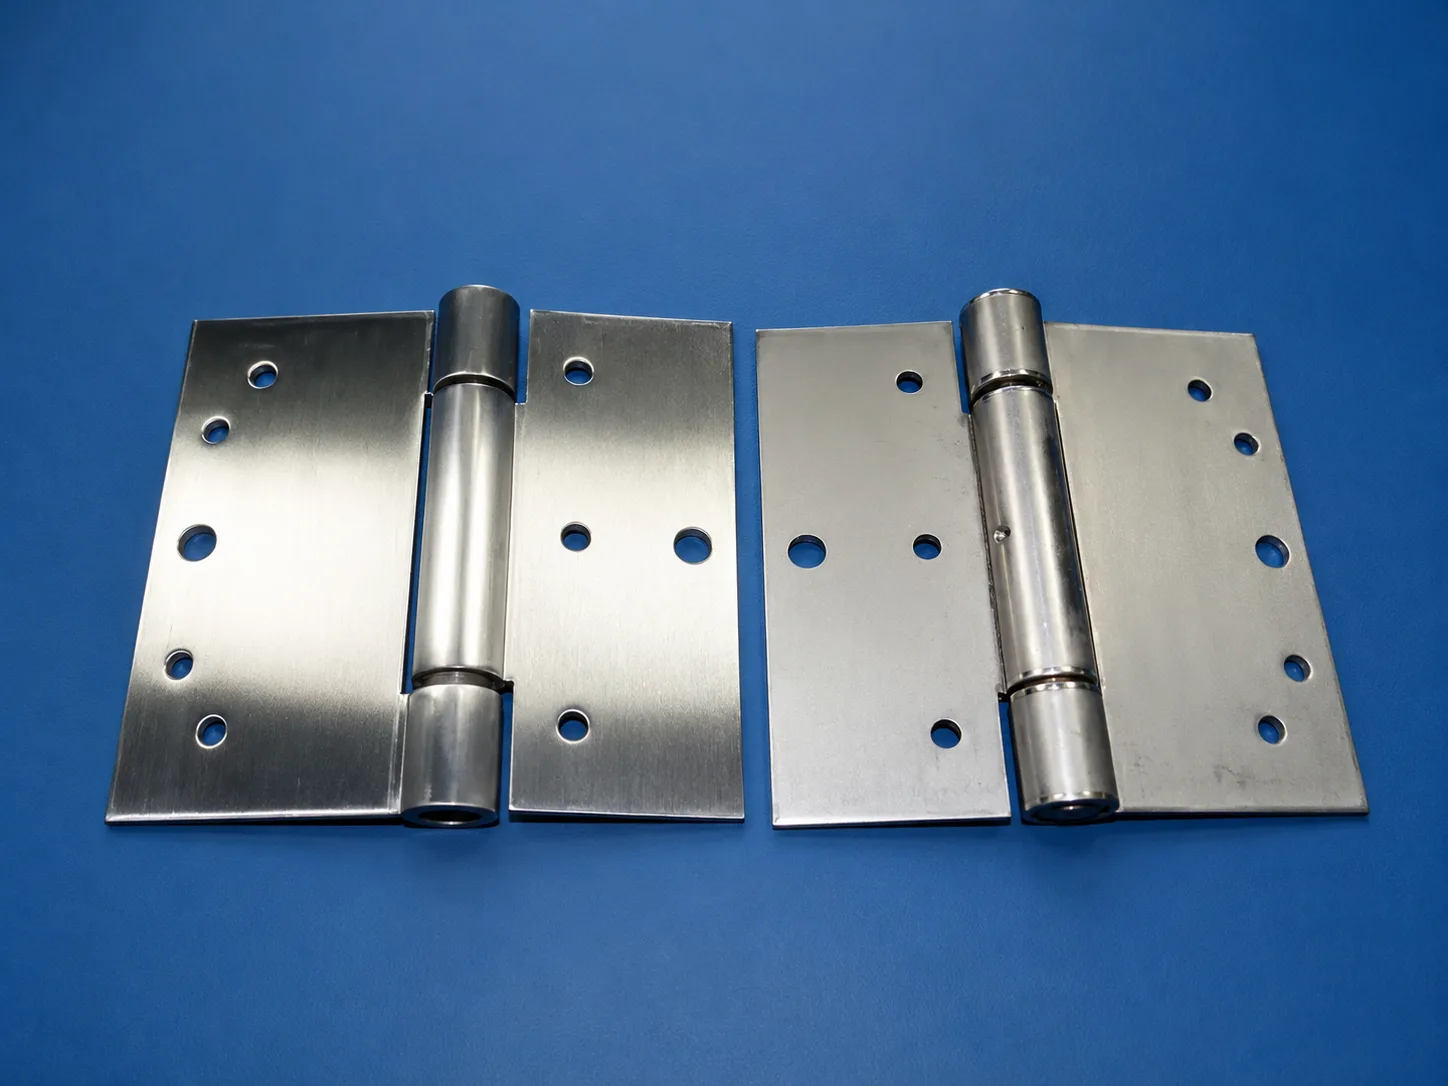
Bright and decorative platings are the most revealing: because they are thin and reflective, they amplify every scratch, pinhole, and burr rather than hiding it, so the surface underneath has to be brought close to perfect before plating. Passivation on stainless works differently — it does not build a covering film the way plating or powder coating does. Instead it removes free iron and contamination so the metal can form or restore its natural protective layer, which is why it depends entirely on clean, sound material and why even correct stainless can still corrode if it is contaminated or poorly passivated, as our guide on why stainless steel hinges can still corrode explains. Powder coating is more forgiving of minor cosmetic marks because it is thicker, but it still breaks over sharp burrs and lifts over contamination, so it does not excuse skipping deburring or pre-treatment. Even functional zinc plating, chosen for protection rather than looks, cannot compensate for a surface that was not cleaned properly before it went on.
The pattern across all of them is the same: no finish overcomes a poor foundation, and the better-looking the finish, the more exposed the flaws it sits on. A demanding decorative finish is actually a sign that the earlier stages had to be done well, because a bright plating cannot be applied successfully over a careless blank. When a supplier offers a mirror or decorative finish on an industrial hinge, the meaningful question is whether the forming, deburring, and pre-treatment were controlled tightly enough to earn it.
How to Read a Hinge Before You Trust the Finish
Because the finish hides as much as it shows, judging a hinge means looking past the shine to the signals of what lies under it. A buyer inspecting a sample can learn a lot without any lab equipment.
Look at the Edges
Inspect hole edges and cut lines for sharp burrs — visually, and with a gloved hand, a cotton swab, or a burr gauge rather than a bare finger. Burrs left under the coating mean deburring was skipped, and corrosion tends to start there.
Look for Show-Through
Tilt the part to the light. Scratches, pinholes, or blotches visible through the plating are forming defects the finish only covered.
Ask for the Steps
Ask what pre-treatment is used, and how bath condition, rinse quality, coating thickness, and adhesion are monitored. Being able to show records — not just describe steps — signals real control.
None of this requires a laboratory — it requires knowing that the meaningful quality lives under the finish, and looking there. A supplier that controls material, forming, deburring, and pre-treatment will have a sample that survives this scrutiny; one that relies on a good coating to cover weak fundamentals will not. This is the same judgment that underpins choosing a supplier at all, which our guide on how to evaluate an industrial hinge supplier covers more broadly.
What We Check Before a Hinge Goes to Finishing
In our own production, quality is confirmed at several points before a hinge ever reaches the plating or coating line. These are the checks that catch a problem while it can still be fixed, rather than after a coating has hidden it:
- Material grade and thickness confirmation
- Sharp-edge and burr inspection
- Oil and residue removal
- Hole-edge and cut-edge inspection
- Pre-treatment cleaning confirmation
- Coating sample approval before the run
Sample Approval: What a Buyer Can Verify
For a buyer approving a finished hinge, a short, repeatable checklist turns a vague “looks fine” into a decision. None of these require a full lab — several can be done with simple tools or requested as supplier records.
| Check | Method | Accept / Reject Signal |
|---|---|---|
| Material | Certificate, or PMI/XRF where required | Correct grade for the application |
| Burrs | Gloved-hand or swab inspection | No sharp or loose burrs |
| Surface contamination | Visual and process record | No oil, residue, or scale |
| Coating thickness | Thickness gauge | Meets the drawing requirement |
| Adhesion | Agreed test (e.g. cross-cut per ASTM D3359 or ISO 2409) | Meets the project acceptance level |
| Edge coverage | Visual or magnified inspection | No exposed base metal at edges or holes |
| Appearance | Inspection under controlled lighting | No blisters, pinholes, or peeling |
The adhesion and thickness rows are worth agreeing on up front rather than after delivery, since the acceptable level depends on the coating system and the service environment. A supplier that can meet a defined checklist like this — and show the records behind it — is demonstrating the control that a good-looking finish alone never proves.
Why This Matters for Cost and Sourcing
Understanding that quality precedes the finish changes how you read a price. Two hinges with an identical-looking coating can cost very different amounts, and the difference is often in the stages you cannot see: the material grade, the care in forming, the deburring, and the pre-treatment.
A supplier competing only on price has strong incentive to cut exactly these invisible stages, because they do not show on delivery. A lower material grade, a skipped deburring pass, or a rushed pre-treatment all reduce cost and none of them are visible under a fresh coating — until the part corrodes at the edges, the plating peels, or the hinge fails later in service. This is the mechanism behind the familiar experience of a cheap hinge that “looked fine” but failed early: it looked fine because the finish was the one stage that was not cut.
The practical conclusion for sourcing is to specify and verify the stages before the finish, not just the finish itself. Confirm the material grade, ask about deburring and pre-treatment, and inspect a sample at the edges and under the light. A manufacturer that controls the full process — material, forming, deburring, pre-treatment, and finishing together — is the one whose good-looking finish actually reflects a good part underneath. If you want a hinge assessed this way for your application, you can send your requirement here for an engineering review that starts with what is under the finish, not just the finish itself.
FAQs
What causes a hinge coating to peel?
Poor pre-treatment is one of the most common causes: a coating bonds to clean metal, not to oil, oxide, or residue, so if a part is coated with contamination still on it, the coating lets go when the contamination does. Cure conditions, coating compatibility, film thickness, substrate outgassing, and mechanical damage should also be checked.
Why do hinge edges and holes rust first?
Because a coating thins over a sharp burr or edge the way paint thins over a corner, leaving the least protection where the metal is most exposed. Edges and holes are also where the hinge is often mechanically stressed. Deburring and breaking sharp edges before finishing gives the coating a rounded surface it can cover evenly.
Can a good finish hide a low-quality hinge?
For a time, yes, which is the risk. A good coating on a flawed blank can pass a quick visual check, then fail in ways that trace back to what was under it: plating flaking where the surface was not clean, rust from a burr that broke the coating, or a fracture at an internal flaw the finish never touched. Judging by the shine alone misses the stages that decide durability.
What should buyers inspect before approving a finished hinge?
Check material grade, burrs at edges and holes, surface cleanliness, coating thickness against the drawing, coating adhesion by an agreed test, edge coverage, and appearance under good lighting. Several of these can be done with simple tools or requested as supplier records, and adhesion and thickness levels are best agreed before delivery since they depend on the coating and environment.
Does surface treatment fix a flawed hinge?
Decorative plating and protective coatings do not correct a poor dimension, internal porosity, a crack, or insufficient thickness; they protect and finish a sound part. Some specialized surface-hardening processes change surface properties, but the plating and powder coating used on most hinges are protective and cosmetic layers. The quality has to be built in before finishing.


 English
  한국어
한국어  Русский
  Español
  Italiano
  Deutsch
  Français
  Português