

How Industrial Hinges Are Made by Stamping: Dies & Tooling
Stamping is one of the main manufacturing methods used for sheet-metal hinge leaves, and it explains much of what buyers find confusing about hinge quotes: why a custom hinge carries a tooling charge, why there may be a minimum order quantity, why edge quality varies between suppliers, and why the same drawing can return with different tolerances from different factories. Much of this is influenced by the tooling strategy, die condition, material, and press setup.
This guide explains how hinge stamping actually works — what the die does, how a flat coil of steel becomes a hinge leaf with holes and a rolled knuckle, and how each step in that sequence sets the burrs, the tolerance, and the cost you later live with. It is written for engineers and buyers who want to read a stamping quote for what it is, and know which questions actually matter.
Summary: What Hinge Stamping Is
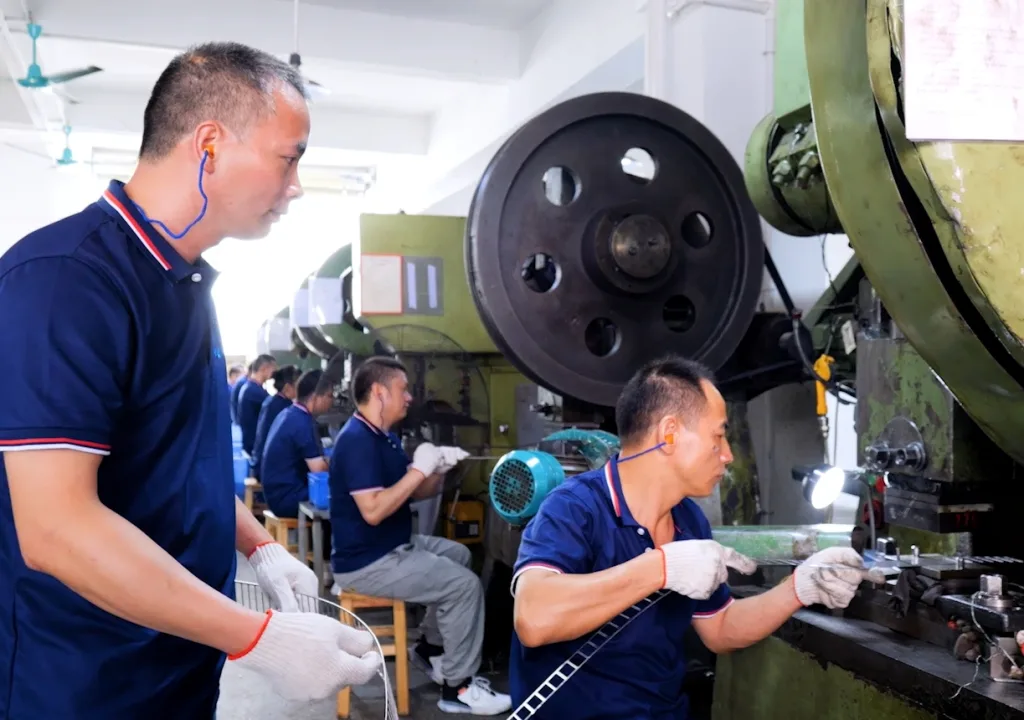
Hinge stamping is a press-and-die process that turns flat sheet or coil stock into a stamped and formed hinge leaf. A press drives a hardened steel die into the metal, and in a controlled sequence the die cuts the leaf outline (blanking), punches the mounting holes (piercing), forms any raised or offset features, and rolls the edge into the knuckle that will hold the pin. Because the die contains the part’s geometry, stamping can be fast and highly repeatable once the tooling is proven — but the die must be designed and built first, which is where much of the custom tooling cost comes from. Material condition, thickness, feed accuracy, press setup, lubrication, die clearance, and tool condition all influence burrs, flatness, and hole tolerance.
What Happens Inside the Die
Depending on the tooling strategy, blanking, piercing, forming, and curling may be integrated into progressive stations or completed through separate press operations. Understanding these four operations is what makes a stamping quote readable.
1. Blanking
The die cuts the outline of the leaf from the sheet or coil. This sets the part’s overall shape and dimensions.
2. Piercing
Punches drive through the metal to create the mounting holes. Hole position and spacing are fixed by the die, not by a separate drilling step.
3. Forming
The die shapes features into the flat blank — countersinks, embossed areas, or a stepped offset — without cutting the metal away.
4. Curling / Bending
The edge of the leaf is rolled into the knuckle that houses the pin, and any bent-arm geometry is formed.
With single-operation or staged tooling, the operations are completed through separate press stages or tools. With a progressive die, the coil advances station by station and each stroke performs a different operation, so a strip enters one end and stamped leaves exit after the final station. Progressive tooling usually costs more to design and build, but it can run faster and with less handling at steady production volumes.
Why the Die Influences Quality Downstream
The die is a part of the process buyers rarely see, yet it strongly influences the geometry and cut quality of a stamped hinge. The die defines the geometry, while material condition, feed accuracy, press setup, lubrication, and tool maintenance determine how consistently that geometry is reproduced. That has several consequences worth understanding.
| Die Factor | What It Controls | What Buyers Notice |
|---|---|---|
| Die design and build quality | Part geometry, hole pattern, tolerance | Whether parts fit the existing hole pattern |
| Punch and die clearance | Cut edge quality and burr height | Sharp burrs at holes and edges |
| Die wear over time | Consistency across a long production run | Later parts differ from the first samples |
| Die maintenance schedule | Burr growth and dimensional drift | Quality falling off between orders |
This is why tooling condition and maintenance should be considered when evaluating a stamped hinge. A first-article sample shows what the process can produce at approval, but ongoing production control is what determines whether later parts continue to match the approved sample.
Where Burrs Come From — and Why They Matter
Every stamped edge is a sheared edge, and some burr is normally produced on the exit side. Understanding how burrs form helps buyers distinguish a controlled stamping condition from excessive burr caused by clearance, wear, or setup problems.
When a punch shears through sheet metal, the material does not part cleanly along a line. It rolls over slightly at the top, shears through the middle, and fractures at the bottom, leaving a small raised lip on the exit side. The size of that burr depends heavily on the clearance between punch and die and on how worn the tooling is: correct clearance and sharp tooling produce a small, controlled burr, while excessive clearance or a dull, worn punch produces a large, ragged one. Because the holes are pierced in the same operation, the hole edges — exactly where fasteners sit and where coating tends to be thinnest — are a common place for burrs to appear.
Why it matters: Excessive burr can prevent the leaf from seating flat and leave a poor edge condition before finishing. The detailed relationship between deburring, coating coverage, and edge corrosion is covered in our guide to hinge quality before surface treatment.
The practical point is that burr size is a tooling and process outcome. Controlling punch-to-die clearance, monitoring wear, maintaining tooling, and defining a deburring requirement all help keep edge quality consistent from first article through production.
Material Thickness and Why It Cannot Be Guessed
Stamping starts from a specified gauge of sheet or coil, and that thickness is one of the most consequential variables in a hinge quote. It affects how much load the leaf can carry, how strongly it resists bending, and how the material behaves during forming.
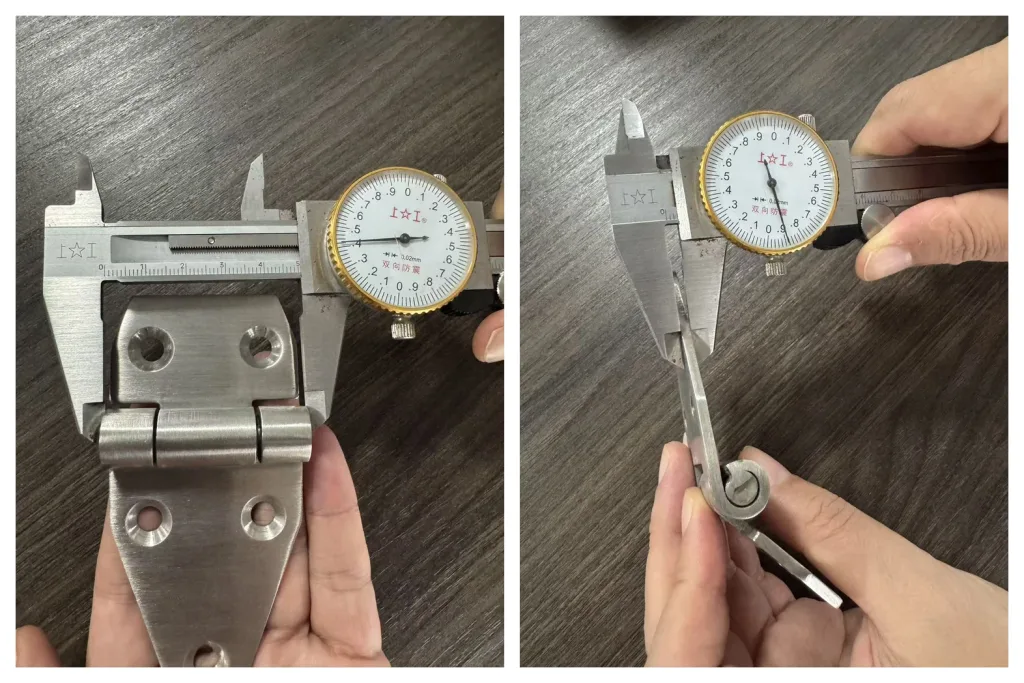
Thicker material generally carries more load and resists deformation, but it also requires more press force, can increase tool wear, and may be harder to form into a tight knuckle without cracking. Thinner material is easier to form and may reduce material and processing cost, but an underspecified leaf may bend, sag, or tear around mounting holes under service load. Because gauge is difficult to judge from a photo, it should be stated on the drawing and verified rather than assumed.
The takeaway for buyers is simple: material thickness belongs on the drawing and on the quote, stated explicitly, and it should be confirmed during sample approval or incoming inspection.
Why Custom Stamping Has Tooling Cost and a MOQ
A common question about custom stamped hinges is why tooling is quoted separately and why a supplier may require a minimum quantity. The answer is usually found in die design, setup, material preparation, handling, and inspection economics rather than in the press cycle alone.
The tooling cost
A die is a precision tool built to match a specific part. It has to be designed, machined, assembled, and trialed before production can begin.
The initial design and build work is largely independent of the first order quantity, so it is commonly quoted separately rather than hidden in the unit price.
The minimum order
Setting a die into a press, aligning it, preparing material, and trialing the first parts takes time regardless of how many pieces follow. Below a certain quantity, setup, handling, and inspection can dominate the cost of each part, which is why suppliers may establish an MOQ.
The initial die design and build are generally non-recurring, although setup, maintenance, repair, storage, replacement of wear components, and future modifications may still create ongoing costs. Repeat orders usually avoid the initial design and die-build lead time, but unit price still depends on order quantity, material cost, setup, tooling condition, and inspection requirements.
It also explains when stamping may not be the best answer. For a small prototype quantity, machining or laser-cutting may be more practical than building production tooling. The volume at which stamping becomes economical depends on part geometry, material, tooling complexity, setup, and expected repeat demand.
Single-Operation or Staged Tooling vs. Progressive Die
Not all stamping tooling is the same, and which type a supplier proposes tells you something about how they expect the part to run. The choice is mostly about volume, and it affects both what you pay up front and what you pay per piece.
| Single-operation / staged tooling | Progressive die | |
|---|---|---|
| How it runs | Operations completed in separate press stages or tools | Coil advances through stations; each stroke does a different operation |
| Tooling cost | Lower to design and build | Higher — more stations, more precision |
| Speed per part | Slower; more handling | Much faster; minimal handling |
| Consistency | Consistency depends more on transfer and setup control | Higher — geometry locked into one tool |
| Best for | Lower volume, simpler leaves, or designs still being refined | Steady, higher-volume hinge families |
The trade-off is straightforward: a progressive die usually costs more to build but can reduce handling and unit cost at steady volume. Single-operation or staged tooling may be more practical when quantities are modest or the design may still change. The appropriate choice should be evaluated against actual volume, part geometry, tolerance requirements, expected design changes, and repeat demand.
What to Specify on a Stamped Hinge Drawing
Because the die is cut to the drawing, anything left vague in the drawing gets decided by the toolmaker rather than by you. A clear stamping drawing prevents most of the disputes that surface after the first article.
| Specify | Why It Matters in Stamping |
|---|---|
| Material grade and gauge | Sets load capacity, formability, and cost; not visible after finishing |
| Hole diameter, spacing, and type | Pierced in the die — the pattern is fixed once the die is cut |
| Countersink or slot requirements | Formed in the die; adding them later is a tooling change |
| Tolerances that actually matter | Tight tolerance everywhere raises cost; tight where it counts is cheap |
| Burr limit and deburring requirement | Defines an inspectable standard instead of a judgment call |
| Bend radius and knuckle fit | Affects cracking risk and how smoothly the pin runs |
The tolerance row is worth dwelling on. Asking for tight tolerance on every dimension is a common and expensive mistake, because it drives up tooling and inspection cost for features that do not need it. The productive approach is to identify the few dimensions that actually control fit — usually the hole pattern and the knuckle — and specify those tightly while leaving the rest at standard tolerance. Getting the hole pattern right in particular is what determines whether the hinge bolts up cleanly, which is why it is worth confirming the hole pattern before ordering.
Stamping in Context
Stamping is one forming method among several, and knowing when it is the right one helps you read what a supplier is offering. It excels at flat and lightly formed leaves in volume — the classic hinge leaf shape — where its speed and repeatability are hard to beat. It is generally a poor fit for thick, three-dimensional bodies that may be better cast or machined, and for detailed torque-hinge housings that may require die casting, machining, or a combination of processes.
For a buyer, the forming method is an important design and cost decision. A stamped proposal should match the part geometry, volume, material, and tolerance requirements.
If you want a part reviewed against the appropriate forming method for your load and volume, you can send us the drawing for review.
FAQs
How are industrial hinges made by stamping?
A press drives a hardened steel die into flat sheet or coil, and the die performs a sequence of operations: blanking cuts the leaf outline, piercing punches the mounting holes, forming shapes features such as countersinks or offsets, and curling rolls the edge into the knuckle that holds the pin. On a progressive die the coil advances station by station, so a strip enters one end and stamped leaves exit after the final station.
Why do custom stamped hinges have a tooling cost and MOQ?
Because a die must be designed, machined, assembled, and trialed before production, the initial tooling is often quoted separately. Setting the die, preparing material, trialing parts, handling the batch, and completing inspection also create costs regardless of quantity, so suppliers may establish an MOQ to keep the production run economical.
What causes burrs on stamped hinges?
Burrs form because a punch shears the sheet: the metal rolls over, shears, and then fractures, leaving a raised lip on the exit side. Burr size depends largely on punch-to-die clearance, material condition, alignment, and tool wear. Correct clearance and maintained tooling help keep the burr controlled; excessive clearance or worn tooling can produce a larger, ragged burr. A defined deburring requirement reduces the risk of poor seating and creates a better edge condition before finishing.
Is stamping better than casting or machining for hinges?
It depends on the part. Stamping excels at flat and lightly formed leaves in volume, where its speed and repeatability are hard to beat. It is generally a poor fit for thick, three-dimensional bodies that may be better cast or machined, and for detailed torque-hinge housings that may require die casting, machining, or a combination of processes. For a handful of prototypes, machining or laser-cutting a small batch usually beats cutting a die, since stamping earns its tooling cost through volume.
What should I specify on a stamped hinge drawing?
State the material grade and gauge, the hole diameter, spacing, and type, any countersink or slot requirements, a burr limit or deburring requirement, and the bend radius or knuckle fit. Specify tight tolerance only where it controls fit — usually the hole pattern and the knuckle — and leave the rest at standard tolerance, since tight tolerance everywhere raises tooling and inspection cost without improving the part.


 English
  한국어
한국어  Русский
  Español
  Italiano
  Deutsch
  Français
  Português